Stars and Stripes Alcohol Ink Ceramic Tiles
The 4th of July is just around the corner, so I thought I'd try some inking techniques in patriotic colors.
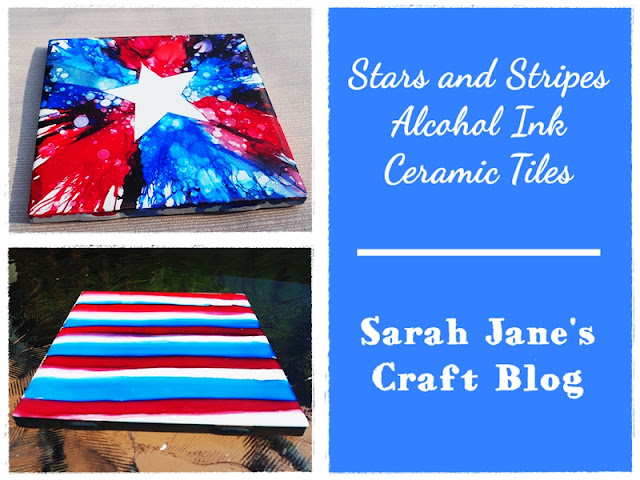
Last month, I tried a technique to create stripes of alcohol ink with a foam brush. It worked fairly well (it worked really well on smaller surfaces), but was tough to apply in straight lines. I figured I'd drag the ink across the tile vertically to see if I could get a straighter line. I also wanted to see if I could use the Pinata white ink to keep the red and blue from turning into purple on the tile as I striped.
Well, the white ink worked well, but striping vertically (I turned the tile after) did not seem to improve my wonky lines. So onto project #2.
This time I wanted to test out using a piece of permanent vinyl (the kind you buy for Silhouette or Cricut cutting machines) as a resist for alcohol ink. I had some vinyl scraps leftover from some previous projects, so I drew a star on the paper backing and cut it out. It wasn't a perfect star, but I was mostly checking to see if this method would work, so I didn't fuss around with printing out a template or cutting one out on my Silhouette. I peeled the backing off of the star and applied it to the ceramic tile. I rubbed down the edges as best as I could so the ink wouldn't bleed under the vinyl.
I selected several shades of blue and red alcohol ink that were as close to primary shades as possible. I used denim and cobalt mixed with a bit of the Pinata white. Stonewashed is another good option, but I'm all out. For the reds I used a mix of poppyfield, crimson, and watermelon. I dripped the ink next to the vinyl star and then used a can of air to blow the ink away from the star and fill the ceramic tile with color.
After I filled the tile with alternating red and blue ink, I got out some rubbing alcohol to add a bit more texture and some additional white to my red, white, and blue design.
I used a pipette that was empty or nearly empty to drip tiny drops of rubbing alcohol onto the tile. If there was a little too much alcohol in the drop, I used the canned air to blow the ink back towards the edge of the tile and added more ink if necessary. I had a little trouble getting the tiny drops/circles I like. I usually fill the pipette with alcohol, empty it back into my container of rubbing alcohol, and then forcefully squeeze air out of the pipette onto the tile to blow any remaining alcohol onto the tile. It works best with fresh pipettes.
I left the tile to dry for an hour or so before I peeled off the vinyl. It came off pretty cleanly. The ink only bled on one tip and in some of the corners where my scissors cut into the vinyl. It worked much better than painter's tape and even better than contact paper. I can't wait to try it with decals that were cut on my Silhouette!
I used some cheap dollar store cotton swabs to clean up the tiny bit of bleed through. The cheap cotton swabs work well because they are plastic and have just a tiny bit of cotton on them that's been wrapped really tightly. I used 3 swabs on both ends to clean up that tiny bit of ink. As soon as the ink starts smearing, switch to a new swab.


Comments
Post a Comment