Posts

Showing posts with the label organization

3D Printed Table Mounted Headphone Holder

Image
Now that we have our 3D printer up and running, we tested out a larger project. My husband often leaves his headphones on the floor, so he needed a hook for his headphones . I used default settings (.2 resolution and 20% infil), and it took about 8 hours to print the two pieces in black PLA . Once it had printed, I immediately tested the screw's threading. It's so satisfying when that works! The hook printed cleanly and is large enough that two sets of headphones can be hung from it.  

Decoupaged Tea Tins

Image
As the summer months draw on, there is one constant--iced tea. My favorite brand comes in these lovely tea tins, and because I have a hard time throwing out potentially useful things, I have several of these things floating around. So, I decided to jazz a couple up to make some storage tins. I started by washing the tins and removing the date sticker on the bottom and then spray painting them with several thin coats of white spray paint . This ended up taking several coats before I was happy with the finish. Light coats are best when spray painting, and it took quite a few to cover the printed design on the tin. Once my tins were spray painted and had a couple days to finish drying, I got out my supplies. I brought out a silicone craft mat , mod podge , a foam brush, and some die cut card decorations from my craft stash. The die cuts were from a tablet of scrapbook paper that I was gifted, I just punched out shapes that I thought would fit on the tins (and that there were two of so my...

3D Printed Alohomora Key Rack

Image
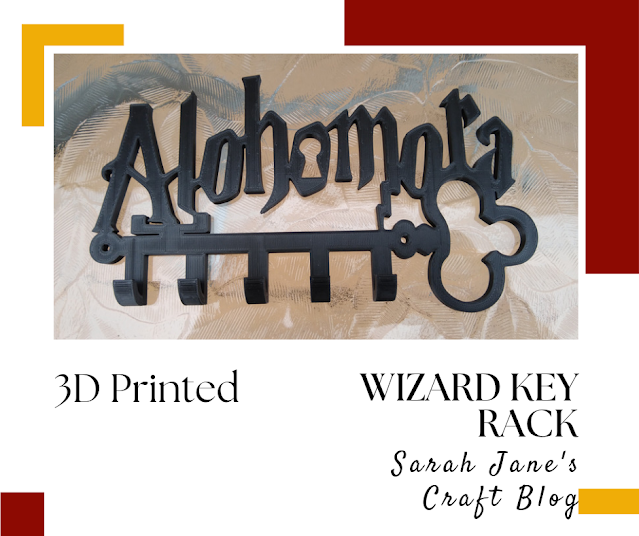
Always on the hunt for useful things to print on our 3D printer, I came across this cute Alohomora key rack . For those of you who aren't big Harry Potter nerds, Alohomora is the spell used to unlock or open, so it's a perfect fit for a place to hold your keys. This print design is a pretty simple one. I sliced it in Cura and used the default settings (.2 resolution, 20% infil). I left the design size at 100%, but had to position it diagonally across the print bed to get it to fit. It didn't take long for the design to start to look like the finished product. I used a Black PLA to print the key rack. I enjoyed checking on this print as it went, it's always fun to see it make the patterns in the middle of a design (for prints that aren't solid). After the tops of the letters finished, it just had the hooks left. The print for this project went really  smoothly. The print took about 6 hours and the only issues I had were with some wisps of plastic on some of the poi...

3D Printed Breathe Right Strip Holder

Image
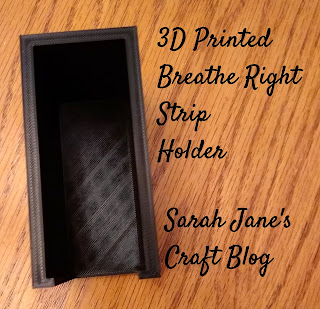
Just a quick print project this week. I'm always on the lookout for ways that our 3D print projects can be useful and not just silly little toys or figurines, so looking for a way to store Breathe Right strips has been on my wish list from early on. When I saw this dispenser  design, I knew I wanted to try it out. I printed the design using standard settings (.2 resolution and 20% infil) using black filament . The print seemed sturdy once finished and took around 5 hours to print. I immediately put some Breathe Right Extra strips in the holder. They fit perfectly (torn apart from their two packs). It has just a bit of extra room in the length, so I'm guessing it also fits the large strips. It easily holds a 44 count box with room to spare. I'm guessing a box from Costco with 72 is its intended capacity, but I haven't tried it out yet to know for certain. I'm not 100% sold on this method of storage, but it seems to work just fine and would likely fit in a small drawe...

3D Printed Spice Caddy

Image
The New Year always makes me feel like organizing things. Some people feel the need to join a gym. I look for spice organizers to print on the 3D printer . Our spice section of our kitchen cabinet has always been a frustrating mess. Partly because we have a shelf with a really narrow clearance and another that I can't reach the back of without a stepstool. So to fix this problem, I wanted trays that would hold a single row of spices that I could easily pull out of the cabinet. I thought we might have to design our own, but then I came across this design for a  Spice Caddy  on Thingiverse and it looked like exactly what I needed. I printed the medium sized design using Black PLA and standard settings (.2 resolution and 20% infil). The instructions were a bit vague about settings, so I used default and they came out very sturdy, so I kept using those settings. I did have to print the design on the diagonal to get it to print on our print bed, but there was just enough room. So ...

3D Printed Battery Dispenser

Image
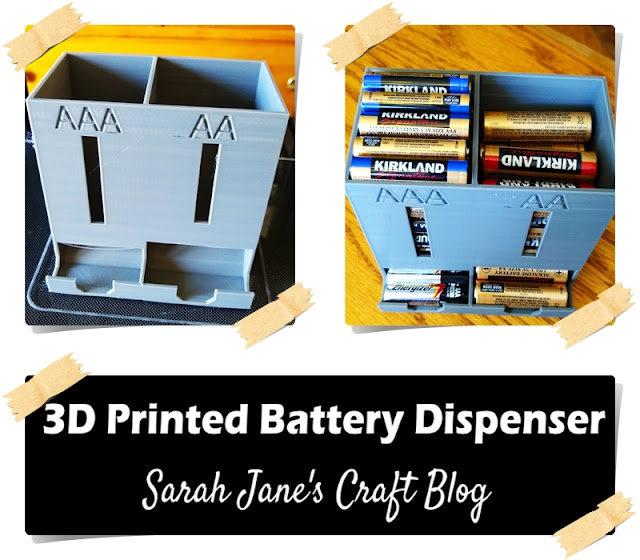
About a month ago, we bought a 3D printer . I've been trying to share our adventures as 3D printing newbies. To check out our previous projects: 3D Print Projects .  This week's print project was one that both hubby and I noticed when we first got the printer. "Oh cool, there's a dispenser for batteries." You know you're old when a battery dispenser gets you excited. So we downloaded and sliced this project from Thingiverse: AA & AAA Battery Dispenser . This print took about 15 hours to print (with PLA in Gray ) and turned out pretty well. We had a bit of sagging in the opening at the bottom because we didn't print any supports (as are suggested by the original file uploader). But it still worked pretty well. I'm happy with how it turned out, given that I missed that instruction when I set up the file for our printer. As soon as the print was off the print bed, we started loading batteries into it. It fits a ton of AAA batteries (36+), but fewer AA...

3D Printed Cotton Round and Cotton Swab Holder

Image
Yet another 3D printing project from our new printer this week. Check out our previous print projects here: 3D Print Projects. This week I decided to print something I knew would be useful. I use cotton rounds every day to clean my face, so when I saw this little organizer I knew I had to print it. I followed the instructions on Thingiverse except that we opted to printed it from the bottom up (I rotated the design when I was slicing it to prepare the print). It took about 6 hours to print because it was set to 50% infil (so the walls and base weren't hollow--they were filled 50%) to make it sturdy, but it came out perfectly! This print job is going to get used a ton!

Storing Clear Stamps

Image
Several years ago,  I made a binder to store my clear stamps . It was filled with heavy duty sheet protectors and white sheets of paper. I just slipped my clear stamps into the pages and could flip through it to find my stamps. This worked fine when I had just a few clear stamps, but as my collection grew, I needed a new storage solution. I had purchased a set of these storage containers filled with small boxes when they were on sale. They were originally designed to store photos, but I was using one of them to store card games. The other was sitting empty in my basement, so when I looked at the bulging binder and the stack of excess stamps, I figured it was the perfect solution. I sorted and cut apart the plastic sheets the stamps are stuck to so that they would fit into the boxes. I labeled each category of stamp with my little label maker, and I ended up with one spare box and a bit of extra space in most of the boxes (except Christmas, I may have to get rid of some of my Chris...

Spray Painted Decorative Boxes

Image
I was organizing some of my board game collection the other day and realized I had some empty boxes from expansions. The extra pieces and new rules fit in with the base game, so the boxes were destined for the recycle bin. But they were such nice sturdy boxes, it seemed a shame to toss them, so I figured I'd try spray painting them. I started with an ombre method that I used before to spray some cylindrical tins and some terracotta flower pots . I used a teal, medium blue , and a purple spray paint. I started out with the teal ( Rustoleum's lagoon ). It's a pretty bright color that has great coverage, so I knew it would be my primary color. I sprayed the ends and the top half of the boxes with the teal and then set them aside to dry. Then I set them down and sprayed the blue across the middle. Then I sprayed the other end purple. I did have to set the boxes up and spray the edges to cover the printing and the bright orange color of the ori...