Posts

Showing posts from February, 2023

First Impressions: T-rex Alcohol Ink Warm and Cool Tone Sets

Image
Several months ago, I bought the Warm and Cool Tone T-Rex Alcohol Ink sets after I had the joy of trying out the base set . They were lovely, so I was excited to try more. After several months of the sealed boxes sitting with my other alcohol inks, I finally got a chance to take them out and see if they were as nice as the base set . I got out the inks, a craft mat , some 4 inch ceramic tiles , a hand bulb blower , and some 90% rubbing alcohol . Each set comes with 12 inks (11 colors and 1 metallic ink). The Warm Tone set has a lot of browns, so I'll probably use the Cool Tone set more, but there's some nice pinks and reds in the warm set, too. Just like with the base set, the colored lids are not a good match to the colors in the bottles, but there's a photo on the top of the box that's fairly accurate for each color. As is tradition when testing new inks, I dripped one drop of an aqua colored ink from the set and see how it moves without any blending solution or air

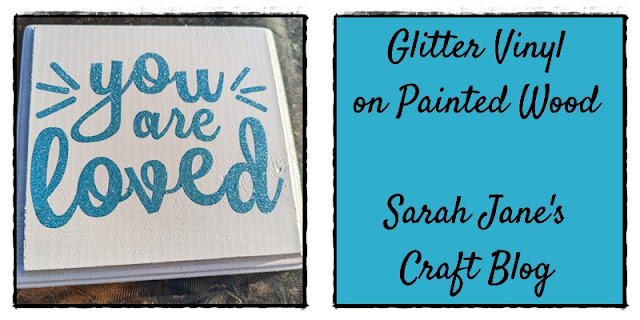
Glitter Vinyl on a Painted Wooden Sign

Image
This summer, I picked up some wooden signs at JoAnne's and I spray painted a couple of them white to use for craft projects. Around Thanksgiving, I made a mod podged sign with one of those painted plaques . Well, the other one was just sitting around, so since I have been enjoying using the Silhouette lately, I thought I'd cut some vinyl for the sign. I perused my collection of free designs from the Silhouette store  I had saved in my Silhouette library and opted for a simple one about love. Since Valentine's has just passed, I knew I wanted to cut it out in a color that wasn't associated with the holiday, so I could leave it out all year. I opted to try out some glitter vinyl that I picked up on a clearance rack at some point and have been eager to try out. So I googled the settings for glitter vinyl. I set my cut to a depth of 2, speed 5, and force 22. I ran the little test and it worked perfectly. I did set it to do two passes as my blade is a bit dull. I dropped

Deadpool Folgers Canister

Image
A couple years ago, I made a discovery. I learned that applying a Deadpool decal to a Folger's can , was extremely satisfying. It was the perfect shade of red and the black lid complemented the black vinyl . So, I decided, any time I have a leftover Folger's can, I was going to slap a Deadpool decal on it. This was a totally doable goal since I don't drink coffee, and I just keep it around for the occasional visitor.  So, when I cut the decal for last week's star sign , I also cut a Deadpool decal that I found using a Google search. I cut it using standard cutting settings for vinyl (though, as I learned from the star sign, I probably should have set it to two passes). I cut the label off of the Folger's can and ran it through the dishwasher on the top rack. Then I cut around the Deadpool decal and grabbed my vinyl pick . The decal weeded pretty well, but it didn't cut around the "I" in Maximum very well. I had to pull it apart. It tore the vinyl a bit

Dollar Tree Metal Sign with Vinyl Decal

Image
After last week's successful project  made with a Dollar Tree galvanized metal sign and some vinyl that I cut on my Silhouette , I knew I had to make another. I bought a star-shaped sign when I picked up the heart-shaped sign, so I already had a sign to decal.  Since it was star shaped, I wanted something that made sense to put on a star. I searched for designs and found a cute "Wish Upon a Star" design . I sent it to my Silhouette using standard vinyl settings and hoped for the best. I cut off a piece of black vinyl and stuck it to the mat to load it into the machine. After a minute of wheezing and grinding (these old Silhouettes are pretty loud--are the newer ones quieter?), I had my pattern cut out. And...that's when things went from going smoothly to crashing and burning. The design was not completely cut through. I managed to make it about halfway down the design before a letter got stuck and I couldn't salvage it. So, I went back to the machine and cut it ag