Posts

Showing posts from July, 2013

As Seen on Pinterest: Spray Oil Manicure

Image
I'm testing out another one of the popular Pinterest DIY posts today.  This time I'm trying out the spray oil manicure.  The original pins suggest that spraying Pam (or a similar aerosol spray oil) will "instantly dry your manicure."  Well, it doesn't do that--not even close.   What it does do is create an oily buffer on your nails that makes them a little less likely to get nicked or smudged.  Awesome, right?  Well sure if you're hands weren't covered in slippery oil....and it only works if you put on a relatively thin coat of nail polish....glob on too much polish and the Pam will leave little bubbles in your manicure...not to mention that things that would normally be a no-no when your nails are drying are still a no-no--it's no magic bullet.  But heck, if you have a bottle of spray oil that's about to expire, chuck it in the bathroom cabinet, it could help save your manicure on a busy day--but be warned it's slippery stuff.

Silver Sea Shells

Image
In a pile of stuff destined for a thrift store, I rescued a bag of sea shells.  I wasn't sure what I was going to do with them, because let's face it, there's a lot of really tacky sea shell art out there, but I knew I wanted to craft something.  I saved a few of the prettiest shells and put the rest in some cardboard boxes to spray them silver (like you see at Pottery Barn and what not). I sprayed them with my Rustoleum Metallic Silver spray paint.  I applied two light coats on the tops. I left them outside for about an hour in between coats. Then I flipped them over and put a good coat on the bottom side.  They were pretty well covered at that point.  I set most of them aside to finish curing inside.  Some of the shells had more nooks and crannies and needed to be sprayed again to get into all of the little corners. I let them dry inside overnight and then put them into a glass vase.  I picked up this one (which is about 10 inches tall) at Wal-m

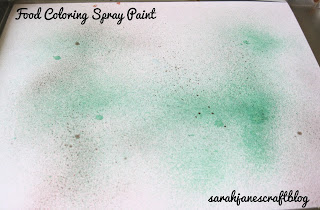
Food Coloring Spray Paint

Image
For my last post, I marbled paper with food coloring, today I'm going to create a spray paint with it. I had no idea that food coloring could be used so easily with paper--the possibilities seem endless. This project is a super cheap and easy way to create that misty air-brushed look. You'll need: Liquid food coloring Small spray bottle  Water Paper Put about one inch of water into your spray bottle (you can find these for about a dollar in the travel section of most big box stores).  Add several drops of food coloring and shake.  About 3 drops will create a water pastel, 5 or 6 drops will create a more saturated color.  I used white cardstock on a cookie sheet to help with overspray.  You'll want to wipe down your table after every few sheets (or put down some newspaper).  As long as the food coloring is still wet, it wipes up easily.  Be sure to run clean water through the sprayer before switching to new colors. After you've experimented with

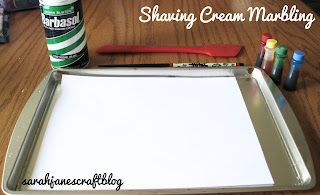
Shaving Cream Marbling

Image
I wanted to do some paper marbling, but after reading several online tutorials, they all required special products (thickeners, special paints, powders to make the paint stick, etc...) and tools (combs, trays, etc...).  So when I read a tutorial for using shaving cream, I figured it was worth a whirl since I had all the stuff on hand. You'll need: Shaving cream A tray or cookie sheet Liquid food coloring Spatula or plastic ruler Chopstick or skewer Paper (I used cardstock) Squirt a layer of shaving cream onto your cookie sheet or tray.  I used a cookie sheet that I picked up for less than a dollar--pretty worthless for cooking on--but good for craft projects. I smoothed it out using a spatula.  You could use a ruler or piece of cardboard. Start by dripping your food coloring on and starting to drag your chopstick or skewer through the shaving cream. Once you have a pattern that you like, you can make a print.  Just drop your paper o

Dowel Rod Loop Turner

Image
This summer I've been making neck coolers .  The most annoying part of the whole process was turning the loop the right side out.  I fiddled with them for what seemed like forever.  I tried making my own loop turner out of a chopstick and a wire, but it didn't really work. So I presented the problem to my husband.  He likes to solve problems. Within minutes, he came up with this idea. He grabbed a 5/8ths inch dowel rod from the garage (I'm sure a half inch dowel rod would work just fine too).  He slipped the neck cooler tube onto the dowel (in picture above). Then he used a tack to attach the fabric to the top of the dowel rod.  He later discovered that a push pin (with it's slightly longer pin) worked a bit better.  He also determined that pushing it through the fabric where the seam is (and consequently more layers of fabric) help to keep it attached to the dowel. Once it's attached comes the fiddly part.  Carefully pull the surrounding fabric up

Egg Carton Campfire Starters

Image
It was the summer of 1990 (give or take a year).  My family went camping at Pickerel Lake State Park in  northeast South Dakota.  It rained a lot on that trip.  So much so that I went to one of the park organized events for kids just to have something to do.  The campground hosts were having some craft project like making candles or something...I don't remember the specifics.  But what I do remember vividly is that they had their fire blazing in the pouring rain, and my Mom asked them how they got their fire started.  They said they used egg carton fire starters.  We had no idea what they were, so they showed us.  As an adult now, I've tried store bought starters and various homemade varieties.  If I'm strapped for space, I make the Cotton Rounds starters that I made a few weeks back, but otherwise--these always come with us camping.  They light easily and burn forever.  Plenty of time to get things started, even in windy or wet conditions. You will need: A card

As Seen on Pinterest: Vinegar and Listerine Foot Soak

Image
I am one of those people who stops wearing socks as soon as it hits 65 degrees out.  I'm a sandals and barefoot kind of girl.  Which means that I was really excited about the prospect of a foot soak that would allow you to rub loose skin right off of your feet and leave them smooth!  The original instructions call for 1/2 cup vinegar and 1/2 cup listerine and 1/4 cup water.  Now, I know that I have big feet, but I can't see how this would possibly be enough for anyone to soak their feet in for 30 minutes.  I doubled the batch.  It still wasn't enough.  I ended up with 1 1/2 cups listerine (thank goodness I had the cheap generic stuff) and 1 1/2 cups vinegar and 3/4 cup water. I then soaked my feet for the full 30 minutes.  After which, they were blue. Alright so that's not that surprising--it is, afterall, blue listerine that I was using.  So I rubbed the solution off with a towel (this is when the dead skin is supposed to just rub right off--it didn'

Silver Striped Spray Painted Vase

Image
I found this great heavy weighted glass vase/candle holder at the thrift store a couple of weeks ago.  It was really nice--department store quality.  Unfortunately, it had a little defect.  There was a small blob (less than a 1/4 inch) of gray/green glass on the side of this otherwise really nice clear glass vase.  It was marked for 99 cents so I decided to rescue it and spray paint it with stripes.  I had been wanting to do that anyway, and the defect gave me the perfect opportunity. I set up my stripes so that the paint would cover the defect.  I tried measuring with the width of the tape, but found that between imperfections in the glass and the stretch of the tape, I was better off just eyeballing it.  I filled the vase up with plastic bags to keep spray paint from going inside the vase and gave it a good coat. I used  Rust-Oleum Metallic Spray, Silver  for this project. I came back for a second coat and it was pretty much finished.  I just had to let it finish dryi

Fun Foam Impression Stamps

Image
Fun Foam Stamps Part 3 (see part 1 and part 2) ?  I could make stamps out of foam all day.... :)  But these are a bit different.  They require you to make an impression in the foam and printing the background instead of the foreground.  Fun foam works great for these kinds of stamps because you can use a simple ballpoint pen to create an impression.  I drew a wood grain on one and a simple vine on the other.  I then trimmed the foam and glued it to a piece of cardboard using tacky glue. After a quick testing, I knew these would work great as backgrounds.  I can't wait to test out the wood grain with some brown ink (unfortunately I didn't have any--so I went with green). I created a blank/just because card using the vines, and a thank you card out of the wood grain by stamping a leaf overtop and layering it with a cute house stamp. These have a ton of potential for all kinds of designs.  These were a great proof of concept--I can't wait to think of a

As Seen on Pinterest: DIY Shower Cleaner

Image
DIY shower cleaner made with vinegar and Dawn has been floating around Pinterest since it's early days.  I first tried it out last year when Pins recommended using it in a spray bottle and some recommended warming the vinegar in the microwave and using it hot when you cleaned.  I'm convinced the hot vinegar was mostly to help keep the mixture liquid enough for a spray bottle. When I tried the spray bottle version, I had to thin it down with 2 parts vinegar to 1 part Dawn to get it to come out of my spray bottle at all, and then the spray bottle was clogged with Dawn by the next time I wanted to use it.  However, it did work to clean my shower--it just stunk strongly of vinegar.  So when I saw the version using a dish scrubbing wand--I knew they had a good idea. I filled my dishwand with 1 part (or halfway) of Dawn Ultra (the standard blue stuff--the old regular Dawn has actually gotten hard to find). Make sure you use a blue scrubber and not a green one--the gree

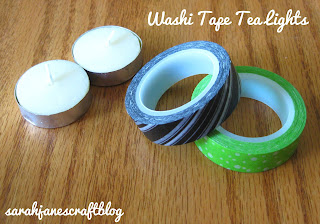
Quick Craft: Washi Tape Tea Lights

Image
This is one of those crafts that when you see it, you think, "Well, why the heck didn't I think of that?"  It's super simple and super cute.  All you need is a roll of washi tape and some tea lights.  Washi tape seems to be all the rage in crafting these days.  It's basically designer masking tape.  Washi is the name for a decorative paper in Japanese.  This washi, or decorated paper tape, can be used for all kinds of crafting.  Because it is so popular, it's been a bit spendy.  But more and more American companies are making their own versions of this type of tape.  I was lucky enough to pick up a few rolls at Big Lots (3 rolls for $3).  So now I've been looking for fun things to do with it.  These decorated tea lights were the perfect project. I bought a bag of bulk tea lights a while back, and I seem to have two different sizes.  One is a little narrower/shorter, and one is almost exactly the same width as the tape.  The black and white stripe ve

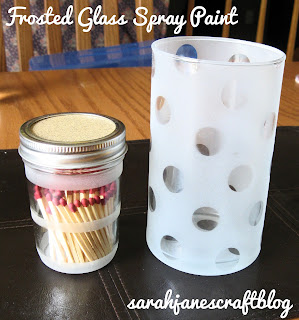
Two Frosted Glass Spray Paint Projects

Image
We had quintuple credit card rewards at Home Depot this month...so when we were in the spray paint aisle, I knew I wanted to try out some frosted glass spray paint to see if it's any easier to use than glass etch for decorative projects. I started out with a glass cylinder vase that I had picked up at the thrift store for 99 cents.  I had originally tried to use my circle punch on some painter's tape, but even when I stuck the tape to wax paper, it didn't get a clean punch, then I remembered I had these circle stickers for color coding some school stuff.  They don't always peel off of surfaces very easily--but I thought it was worth a try.  I spaced them evenly but randomly on the glass.  When I was done sticking them on the glass, I went back and pressed each sticker down to make sure it was stuck to the glass well. I figured that since I was already spray painting the vase, I might as well spray another project at the same time.  Stripes on a small