Posts

Showing posts from 2017

Christmas Ornament Collection

Image
Merry Christmas from Sarah Jane's Craft Blog! Check out all of my Ornament Tutorials here: Christmas Ornament Collection .

Transparency Film Photo Ornaments

Image
A long long time ago, I bought some printable transparencies (in grad school, like 10+ years ago) back when people still used overhead projectors. Several years ago, I made some ornaments with my leftovers sheets. At the beginning of the holiday season, I bought a bunch of blank ornaments from Michael's. I've been using my plastic ornaments , but I also had some flat glass ornaments ...and as it turns out, exactly one leftover sheet of printable transparencies. So I decided to make a set of photo ornaments for my family. I opened the photo in Word so I could easily see the size in inches. My ornaments were 3 inches, so I used the circle/oval frame to crop the photo to the right size. Then I copied it 3 more times to fill the sheet. It was my last sheet, after all. I wasn't about to waste it. I followed the instructions on the package of transparencies. There's a slightly rough side that needs to be put in on the side that prints and then I had t

Mod Podge and Holiday Napkin Ornaments

Image
Last week I shared a project made with a package of clear plastic ornaments I got at Michael's. This week I used the same ornaments with mod podge and some holiday napkins to create some cute ornaments. I saw these black napkins at Walmart and thought the foil snowflakes were really pretty, so I bought a pack to craft with (and maybe use as napkins, we'll see :)). So I got out my glossy mod podge and a foam brush and two of the plastic ornaments (and a paper plate to work over). After opening the package of napkins, I found that only the front fold was foil embossed, the rest of the napkin was covered in gold ink--still cute, just not as cute. So I cut out the foil snowflakes from 3 of the napkins for my 2 ornaments (that's 2 napkins' worth on the plate above). I used a regular scissors and cut hexagonal shapes around the snowflakes. The embossed shapes meant that the black napkin was pretty well adhered to the second layer of the napkin. If your l

Alcohol Ink Ball Ornaments

Image
On my last trip to Michael's, all of their blank ornaments were on sale, so I picked up a bunch of plain ball ornaments. I even got a box of clear plastic ball ornaments . In years past, I have used alcohol ink to decorate glass ball ornaments , this year, I thought I'd try the plastic ones out to see if they worked just as well. I also thought I'd try out using the Pinata Alcohol Inks to see if there were any substantial differences (now I know that doesn't make for a great experiment when I change two of the variables, but bear with me). Anytime you work with alcohol inks, cover your work surface with a craft mat or parchment paper. Once the ink dries, it does stain. If the ink is still wet, you can wipe up spills with rubbing alcohol. So I laid out my craft mat and my inks. You can use Ranger Inks for this project too (and they are more widely available at craft stores) if you'd like, but I thought I'd try out the Pinata ones. I grabbed

Mod Podge Princess Bride Ornaments

Image
I hope everyone had a fantastic Thanksgiving! The weekend after Thanksgiving is often filled with shopping and decorating for the upcoming Christmas season. We got our lights put up outside, the stockings hung on the mantle, and the tree is up with lights on it--but it isn't decorated yet. I have a ways to go to be ready for Christmas, but at least we're headed in the right direction. Every year I make new ornaments to add to our tree, but this year I was involved in an ornament exchange with an online group, so I also needed to send an online friend an ornament. We are both big fans of the Princess Bride movie, but it's pretty hard to find Christmas ornaments with characters from that movie on them, so I decided I should make my own. I went to Michael's looking for ornament blanks, but I couldn't find any round or square ones, but they did have these fancy ceramic ones--and they were on sale, so I grabbed a few. I went online and printed out some scre

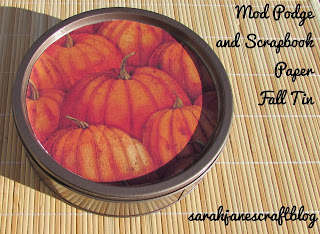
Mod Podge and Scrapbook Paper Fall Tin

Image
I have just enough time to squeeze one more fall craft in before the onslaught of Christmas begins. So with my remaining time, I decided to decorate a Christmas tin with pumpkins out of sheer defiance. Last summer a converted a Christmas tin into a decorative tin that I keep playing cards in, but this time, I definitely wanted to go a bit more Fall/Thanksgiving in nature. I picked out some cute pumpkin scrapbook paper and tried to find a spray paint that coordinated. I ended up going with the oil rubbed bronze again, but this time I used this Rust-Oleum Hammered Bronze . It gives a nice finish, but it's a bit more finicky to work with. It goes on thicker and takes longer to dry than typical spray paint, so if you pick up a bottle, keep that in mind when you're working with it. The spraypaint gives pretty good coverage, but it took several coats to get all the edges and sides of the tin covered well...and since it takes longer than usual to dry, it took a few

Spray Paint Marbled Holiday Paper

Image
A few years ago, I did a couple sessions of spray paint marbling . It's a really fun and fast project, so I thought it would be a great way to kick off my holiday crafting season. Also, it was nicer out today than it has been in a long time (it's been unseasonably cold here), so I thought I'd take the opportunity to get out on the sun-warmed deck and decorate some paper. For this project you'll need: a plastic tub big enough to hold a couple inches of water and a whole sheet of paper (and it needs to be ok to get paint on it), some spray paint, some vinyl gloves, and some card stock (or other heavier paper that can get wet without tearing). I'm not generally bugged by getting paint or dye on my hands, but I strongly recommend using gloves for this project. Spray paint is very stubborn to get off skin and even more stubborn to get off your nails. The first time I did this project, I had paint under my nails for weeks. My favorite spray paint for this proj