Posts

Showing posts from September, 2023

Alcohol Ink Stained Wood Pumpkin

Image
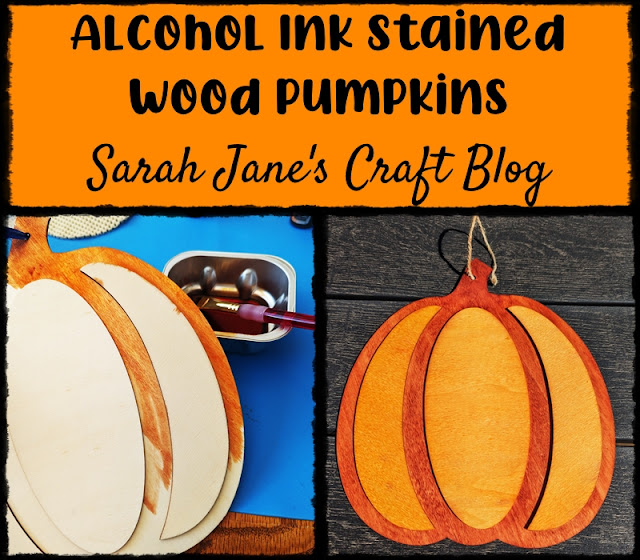
Earlier this year, I experimented with staining wood with alcohol ink . It was successful and hasn't faded after a couple of months, so when I saw this two-layer pumpkin on a recent trip to Dollar Tree, I knew I needed to try another staining strategy. The wooden pumpkin came with a raffia bow glued to the top, so I pulled it off and scraped the glue off and sanded the area until it was smooth. Then I put some blue painter's tape onto the twine string so that I wouldn't get ink on it. I laid down a silicone craft mat and rounded up all my orange alcohol inks . I started by dripping some of the darker shades of orange into a metal container and thinning it a bit with 91% rubbing alcohol . Then I used a paint brush to paint it on the bottom layer of the pumpkin. I painted about 3 layers of the darker orange on the bottom layer and attempted to mix in some brown to make the stem pop a bit. I let the darker layer of ink dry for about an hour and then I came back and made anoth

Fall Craft Collection

Image
 As we slide into fall, I thought it was time to share the Fall Craft Collection to remind you of all the projects that have been featured on the blog for Fall , Halloween , and Thanksgiving.

3D Printed Beluga Whale

Image
Since our 3D printer is back up and running, I decided to try out this adorable design I saw on Thingiverse for an articulated beluga whale . I decided to try some multicolor filament on this project. It wasn't quite big enough to get the full effect, but it did turn into a cute ombre effect. I followed the recommended settings for this print (.2 resolution and 20% infil with a brim), however I did make it a bit smaller (80% it's original size). The print still took about 10 hours. The brim did help a ton with bed adhesion which can sometimes be an issue with these articulated prints, but it was a pain to remove. The print came out fairly cleanly. There were a few spots with tiny gaps in the filament, but otherwise it was a success. It took a lot of fussing to remove the built in supports and the brim (especially between the segments) to get it moving freely. It turned out to be mostly successful, and the design is adorable, so I might try it full size in a different filament

3D Printed Table Mounted Headphone Holder

Image
Now that we have our 3D printer up and running, we tested out a larger project. My husband often leaves his headphones on the floor, so he needed a hook for his headphones . I used default settings (.2 resolution and 20% infil), and it took about 8 hours to print the two pieces in black PLA . Once it had printed, I immediately tested the screw's threading. It's so satisfying when that works! The hook printed cleanly and is large enough that two sets of headphones can be hung from it.