Posts

Showing posts from July, 2014

Death Star Fun Foam Impression Stamp

Image
Hubby and I celebrated our anniversary last week, and I wanted to make a geeky gift bag to put a few gifts into as a heartfelt gesture.  I also thought it would be cool.  So I decided I should try to make a Death Star stamp.  I mean, really, who doesn't love the Death Star (you know, except the people of Alderaan and pretty much all of the Rebels, but why split hairs)? I figured the easiest way to make a Death Star stamp would be to make an impression stamp with fun foam . I tested this concept awhile back and made some very basic stamps, but nothing quite this large.  I started by finding a coloring book outline of the Death Star online.   I put my cut out Death Star on top of my foam and drew around it with a ballpoint pen.  I then cut the circle out of the fun foam. Next I drew over the most prominent lines on the Death Star with my ballpoint pen to get a general impression.  The pen doesn't sink in much when drawing on top of the paper, so just get t

Vellum Photo Candle Holders

Image
I've seen quite a few projects that used vellum to create luminaries or candles holders or lanterns with printed photos on them.  A long while back, I picked up an 8 1/2 x 11 sheet of vellum at the local Michael's figuring I'd get around to making something with it eventually.  Well cue eventually.  This week I printed a set of photos of my family onto the vellum to make some candle holders. I opted to use Word to make my print outs because it has a feature where I can easily see how big in inches (not in pixels) my photos are and it doesn't alter them from that measurement when you go to print it (as has been the case with some photo printing programs).  I measured my candle holders  which ended up being about 10 inches in circumference and about 3.5 inches from the lip on the bottom to the top edge.  I made my photos 3.6 inches because I'd rather they be a bit large and need to be trimmed than not be big enough to go all the way to the top edge.

Crafting Revisit: Alcohol Ink Washer Necklaces

Image
Alcohol Ink Washer Necklaces are my most popular blog post.  There's good reason, too.  They are really cute and really easy.  All you need is a pack or two of alcohol ink (a 3 pack retails for $7-10, but you can use a JoAnne's or Michael's 40 or 50% off coupon to get an even better deal), an applicator ( I made mine out of scrap wood and velcro), felt, some rubbing alcohol, and something to work on (I have a craft mat , but parchment paper would work well too). Oh and you'll need some washers and some cording to make the necklaces too. I decided to make a few more necklaces because I have a bunch of bright alcohol inks that I didn't have when I tried this craft the first time.  I grabbed some washers from my local hardware store and a couple of large washers that I had in a kit to secure a shelf to the wall (no small kids at our house to climb on the furniture, so they were just sitting in a scrap pile). I picked out some bright colors and dott

Memory Glass Sun Catchers

Image
A while back, Tuesday Morning had boxes of Memory Glass on sale for 99 cents a box.  I picked up a few shapes and styles figuring that I'd find something to do with them eventually.  Well I saw an interesting tutorial to create a faux leaded edge with embossing powder that I knew I had to try.  So I made some little sun catchers. I picked out some stamps from my collection that would fit on the little square. I carefully set the square on top of the stamp.  It smudges and smears easily on the glass so the glass needs to be set on, pressed down and lifted up carefully (I learned that the hard way). The stamp turned out a little thin across the top, but there is there enough to emboss. Then I scooped clear embossing powder  and let it cover the ink.  I tapped as much of it off as possible. Then I used the heat gun to set it (the photo of heating it up on my cork trivet turned out blurry, so you just get the finished product). Next up,

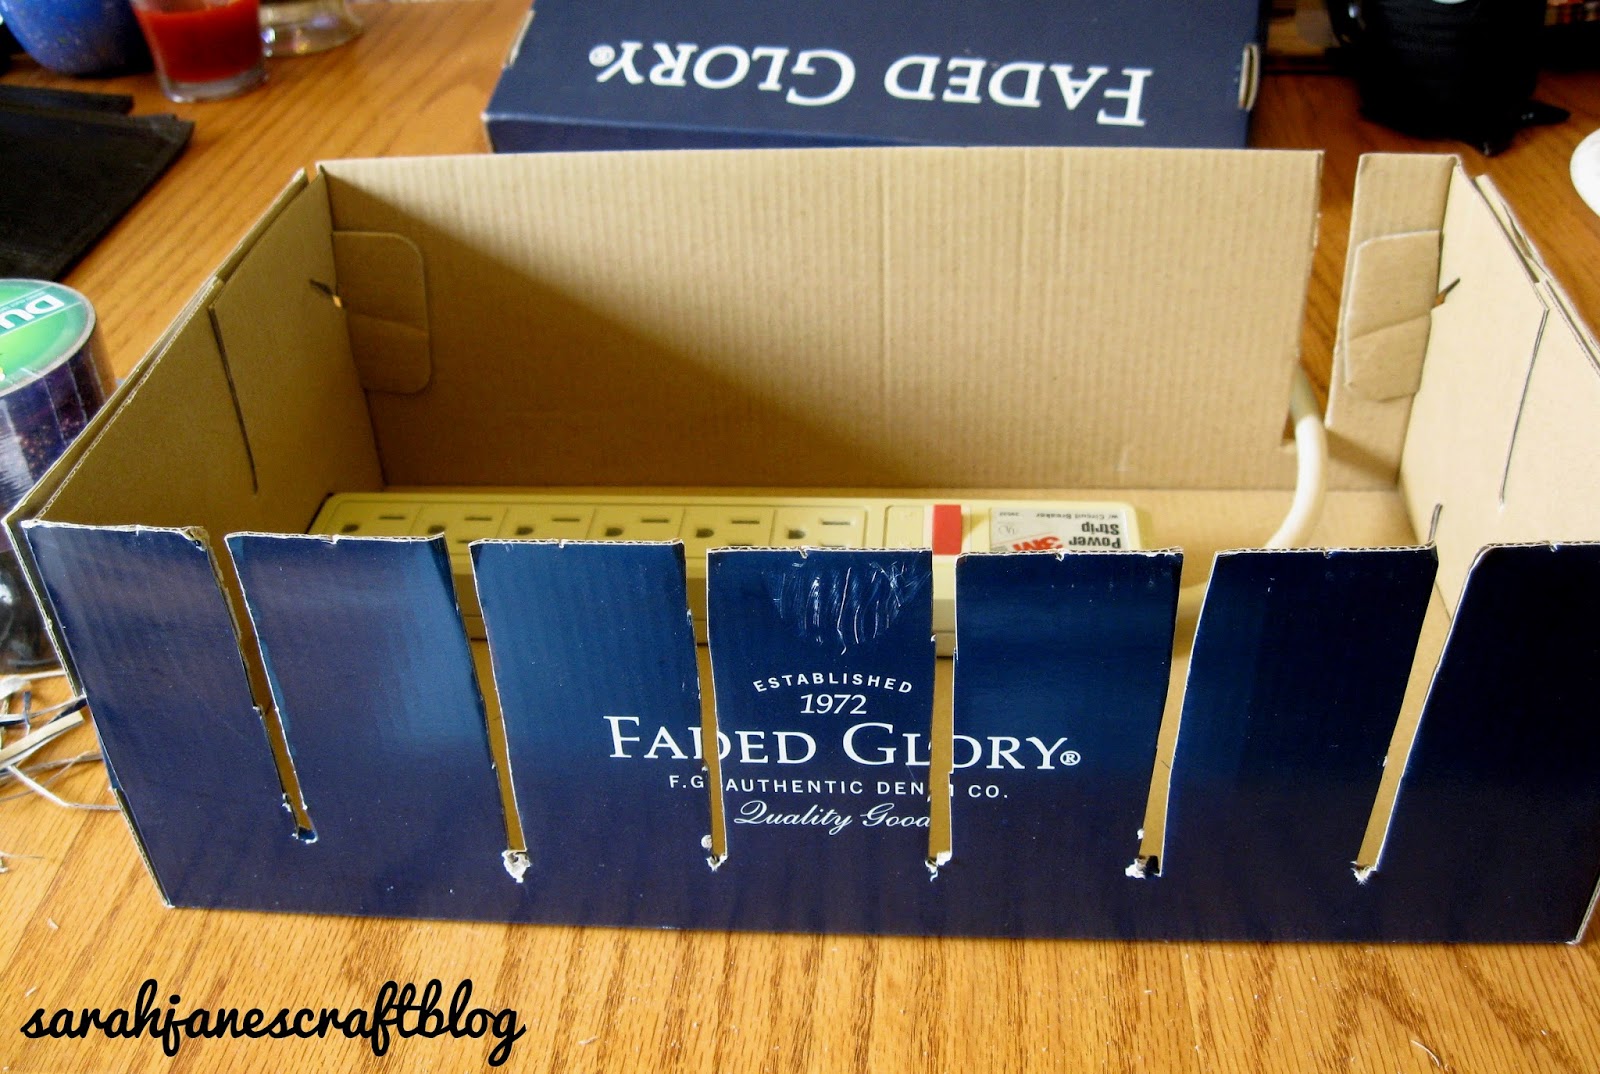
Duct Tape Shoebox Charging Station

Image
After successfully covering some boxes in duct tape to make some simple storage boxes , I got the idea to make a charging station out of a shoe box and some duct tape.  I figure it was cheap, easy, and had to be better than the pile of cords near my husband's night stand. The first step was to take a shoebox from a large pair of shoes and cut slits in it.  I cut a slit in the back that was large enough for my powerstrip's cord and 6 slits in the front of the box for the 6 outlets on the powerstrip.  After measuring the box, I realized that I could cut the slits 2 inches apart for an even look.  I just used a scissors to cut them, and though I tried to get them straight, it was hard to cut the cardboard.  I wasn't too worried about it since I knew I was covering it up with duct tape and that would even things out a bit. Once all of the slits were cut, I ripped some 3-4 inch long pieces of duct tape and wrapped them around each of the sections of cardboard.  I

Stars and Stripes Candle Holder

Image
Last weekend I went to our local Dollar Tree to pick up some 4th of July napkins and some of those altar candles (you know the ones ) that are such a great deal.  Unfortunately they didn't have any at our local Dollar Tree, so I was left with a conundrum: go to other Dollar Trees looking for them or wing it.  I chose to wing it. So I came home with one of these  and a package of stars and stripes napkins. I grabbed my Mod Podge, a foam brush, a scissors, and a paper plate (not pictured--I used it to keep glue from getting on the table) and got to work.  My napkins had a repeating design on each of its four quadrants, so I cut the napkin into four pieces and then pulled the two-ply layer off of the back of the printed part of the napkin.  Once pulled apart, you are left with something close to the consistency of tissue paper. Based on the height of my candle holder, I trimmed a bit off of the top of the napkin and crumpled it up a little so that the inevitable wri