Posts

Showing posts with the label uv resin

UV Resin Sealed Alcohol Ink Washer Necklaces

Image
Over the last few weeks, I've been putting the T-Rex alcohol inks through their paces. I started out with a test of the warm and cool tone sets and continued to use the sets to try out some standard alcohol ink methods ( plastic wrap , flaming , etc...). They've been a pleasure to work with, and though you do have to watch out for the inks getting dark because the colors are so nicely saturated, they are usually in line with the other quality inks ( Ranger , Pinata ) that I've worked with. So, I decided I would try them out with a classic craft blog project-- Washer Necklaces . This would also give me the opportunity to try sealing the necklaces with UV Resin (which has been on my to do list ever since I first tried the stuff ). So I got out a few large washers (the kind you get from the hardware store) and a collection of blue T-Rex inks, some paint brushes, rubbing alcohol, and a small pan for mixing/thinning ink. I also used a lighter to help move and set the ink. The ...
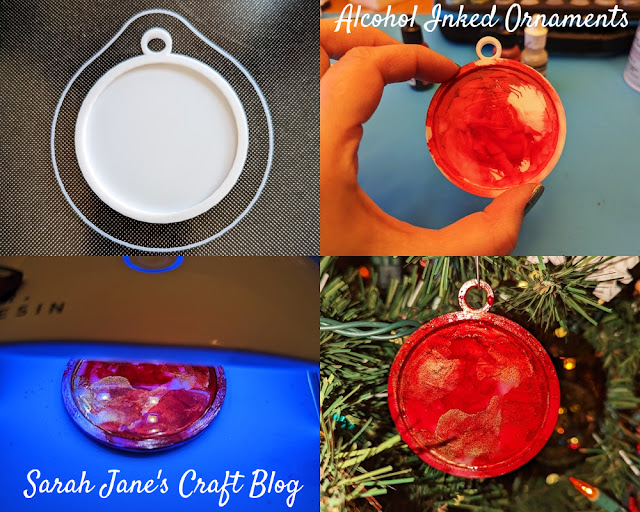
Alcohol Inked 3D Printed Ornament Blanks with UV Resin

Image
A couple of weeks ago, I posted a project where I printed ornament blanks on our 3D Printer and then topped them with recycled Christmas cards and UV resin . The blanks turned out so well, that I thought it would be fun to try to ink them. I've used alcohol ink on tons of ornaments (from plastic to glass to wood to ceramic ) and have had mostly good results, so why not. I have inked on 3D printed plastic before, but I've only stamped it (like these ornaments from last year) on. The reason I've only ever stamped 3D printed plastic is because of the grooves that are left from the printing process. The ink soaks right into those lines. So, I had an idea, why not put a tiny bit of resin on the bottom of the ornament to seal up those grooves. So I printed 3 ornament blanks and two of them got the UV Resin skim coat. As you can see in the first photo, I put very little resin on the ornament. Then I used a small piece of cardboard to swipe it around the ornament. Unfortunatel...

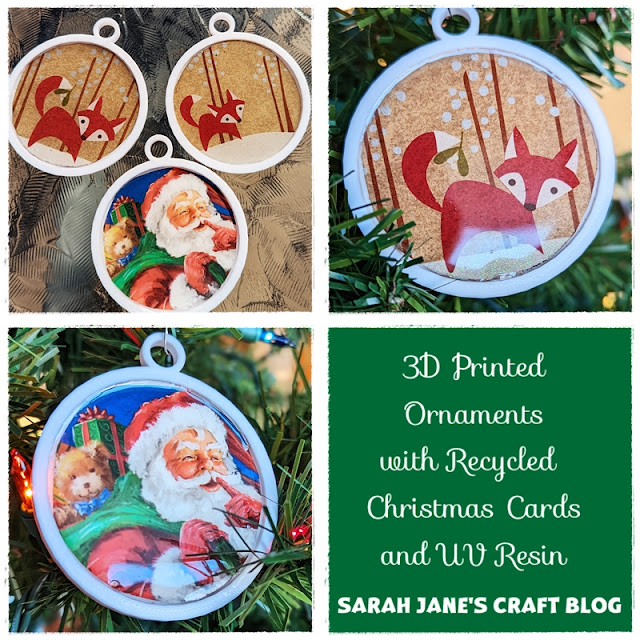
3D Printed Ornaments with Recycled Christmas Cards and UV Resin

Image
Last year I went a bit crazy printing Christmas ornaments on our new 3D printer . This year, I'm being a bit more selective. One of the things I knew I wanted to find a design file for was a good ornament blank. I knew I could do all sorts of fun crafts if I found a good one. Well I found the first one to try from someone who made and advent tree using these blanks . I followed the recommended settings (.16 resolution and 100% infil) with white PLA . The 100% infil made them pretty solid and meant that a fairly simple print still took an hour and a half to complete. After I managed to print a few of the blanks, I went through my stash of old Christmas cards which I save like a total craft hoarder (but it's not the first time I've used them: Recycled Christmas Card Ornaments ). I found a plastic lid that was really close to the the size of the inside ridge of the ornament blanks and used a pen to trace around the circle on the greeting cards and carefully cut them out. In t...

UV Resin: First Experiments

Image
I've been resisting resin crafting for quite a while. It's expensive, fiddly, and sometimes toxic. But once I learned about UV resin, I figured it might be a good option to try. It's used specifically for small projects, doesn't need to be mixed with a hardener, is less toxic, and sets in minutes. After trying a bunch of air dry glazes on washers, I thought that UV resin might be a good thing to try. During prime days, a starter kit from Mr. Resin went on sale and I decided to bite the bullet and give it a try. The kit came with resin, two resin spatula/stirrers, two resin cups for mixing, and a uv light. There were pretty minimal instructions with the kit. I had seen some YouTube videos of people using UV resin, but I was left to guess about a lot of things. So, it was time to do some experimenting. I bought a resin mold kit for making jewelry, though not everything in the kit is ideal for UV resin, but it was a good place to start. You will also need a silicone ma...