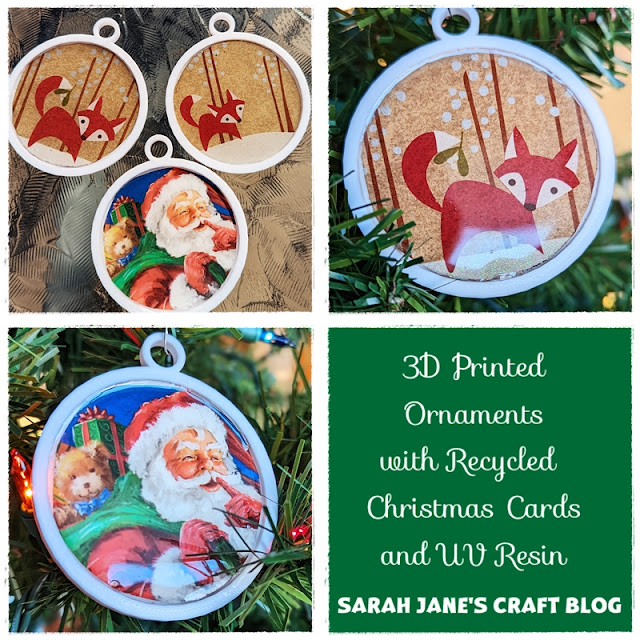
3D Printed Ornaments with Recycled Christmas Cards and UV Resin
Last year I went a bit crazy printing Christmas ornaments on our new 3D printer. This year, I'm being a bit more selective. One of the things I knew I wanted to find a design file for was a good ornament blank. I knew I could do all sorts of fun crafts if I found a good one. Well I found the first one to try from someone who made and advent tree using these blanks.
I followed the recommended settings (.16 resolution and 100% infil) with white PLA.
The 100% infil made them pretty solid and meant that a fairly simple print still took an hour and a half to complete.
After I managed to print a few of the blanks, I went through my stash of old Christmas cards which I save like a total craft hoarder (but it's not the first time I've used them: Recycled Christmas Card Ornaments). I found a plastic lid that was really close to the the size of the inside ridge of the ornament blanks and used a pen to trace around the circle on the greeting cards and carefully cut them out. In the future, I think I'd use a better template or find a die cut because I'm terrible at cutting out circles.
Then I used some mod podge to glue the Christmas card circles onto the ornament blanks. I was pretty sure Mod Podge would stick to the plastic since I used Tacky Glue on a previous project that worked really well, and both glues have PVA glue as their base, but it was still a bit of an experiment for me.
I used a foam brush to spread a layer of mod podge onto the ornaments and then placed the Christmas card circles onto the glue and smoothed them out. Then I let them dry for a day. The Mod Podge seemed to work well. If you don't have UV Resin for the next step, you could just use another coat of Mod Podge over the tops of your greeting cards and be done.
I got out my silicon mat (important for when using resin) and my resin kit. I warmed up the resin a bit by running some warm water over the bottle as this brand is pretty thick. I was pretty sure UV resin would work fine with PLA because I had seen other 3D printers use it for creating smooth finishes, so I thought I'd give it a whirl for these ornaments.
I squeezed a few rings of resin onto the Christmas card circles and then used a little silicon spatula to smooth the resin out. I used a lighter to pop some of the bubbles but had to be very careful as a lighter will melt the PLA plastic of the ornament.
Then I used the UV light to set the resin. This UV resin only seems to have a smell in the first 90 second of cure time--otherwise it's pretty odor free. I'm pretty sure this was set after two 90 second cycles, but I ran a third just to be sure. Then I left them in a sunny spot for a few days to finish curing before hanging them up.
These turn out great--so shiny and they have a pleasant heft for something made of plastic. I'm glad I got to use my UV resin and my 3D printer together for a craft!


Comments
Post a Comment