Alcohol Inked 3D Printed Ornament Blanks with UV Resin
A couple of weeks ago, I posted a project where I printed ornament blanks on our 3D Printer and then topped them with recycled Christmas cards and UV resin. The blanks turned out so well, that I thought it would be fun to try to ink them. I've used alcohol ink on tons of ornaments (from plastic to glass to wood to ceramic) and have had mostly good results, so why not.
I have inked on 3D printed plastic before, but I've only stamped it (like these ornaments from last year) on. The reason I've only ever stamped 3D printed plastic is because of the grooves that are left from the printing process. The ink soaks right into those lines. So, I had an idea, why not put a tiny bit of resin on the bottom of the ornament to seal up those grooves. So I printed 3 ornament blanks and two of them got the UV Resin skim coat.
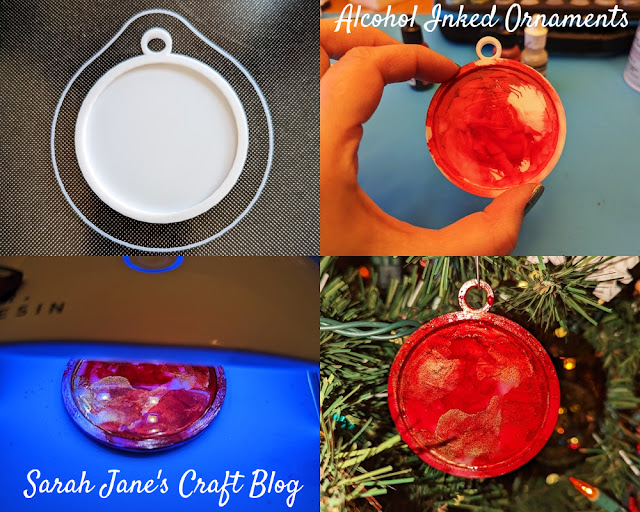
As you can see in the first photo, I put very little resin on the ornament. Then I used a small piece of cardboard to swipe it around the ornament. Unfortunately, with that amount of resin, it doesn't self-level much (so it was a bit rippled/bumpy), but I set it with my UV light for 3 minutes and went ahead and got out my inks.
The first of the UV resin ornaments I did using Crimson and Poppyfield with some Pinata Rich Gold (it's the one from the collage at the top of the post). The ink did not sink into the grooves of the printed plastic (yay!) but it didn't move very well when I thinned it with rubbing alcohol and used a can of air to blow it, but it did move enough for me to cover the ornament.
On the second ornament with the UV resin skim coat, I used a couple of shades of dark purple (Pinata Blue-Violet and Ranger Vineyard) and some silvers (Pixiss Silver and Ranger Silver). And managed to get ink all over my hands. This is why some people wear gloves when inking (most of it came off with some hand sanitizer, but not all of it--my nails will be purple for a few days).
Next, on the ornament without the resin, I used a couple shades of pink (Pinata Magenta and Ranger Wild Plum) with more of the Rich Gold. I enlarged the photo so you could see what it looks like on bare 3D printed PLA. It works, but I had to use a lot of rubbing alcohol to thin the ink to get it to move around, and the grooves of the printed lines of plastic are visible.
Well, it wouldn't be a craft project in December if the photos didn't get darker throughout the project. Darn those short days. I got all three ornaments inked. The ones with the UV resin skim coat looked a bit better, but the lumpy UV resin was almost as visible as the grooves from the plastic in the bare ornament.
But, why quit there, I used the UV resin to make a nice glossy coat over the top of the ornament. I squeezed a bunch on and smoothed it out with the cardboard and a tiny spatula that came with the UV resin kit. I didn't seal the ink before adding the resin to the top--I was a bit worried it would react with the ink and turn purple, but it didn't!
After smoothing and using a lighter to pop bubbles, it was ready for curing.
I set it for 3 minutes to cure before moving on to the next ornament.
The best part of this project was that I learned a lot from the process. 1) PLA can be "sealed" with UV Resin 2) If the base coat is lumpy, it won't show when the top coat is applied (yay!) 3) This brand of UV resin doesn't react with alcohol (at least, not that I could tell). I look forward to more creative experiments with PLA and alcohol ink in the future!!


Comments
Post a Comment