Posts

Showing posts from June, 2020

Happy 4th of July!

Image
Check out the blog's collection of 4th of July crafts: 4th of July Craft Collection

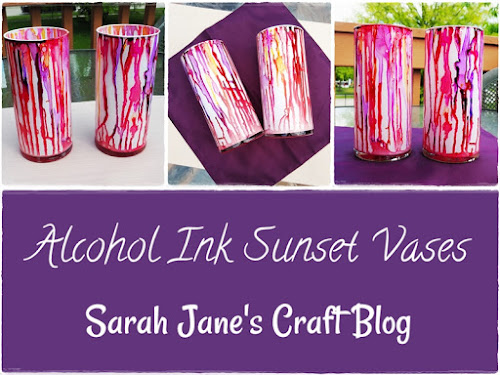
Sunset Vases: Alcohol Inked Vases Backed with White Spray Paint

Image
My sister gifted me some cylindrical vases that she didn't want any more and I've been trying to come up with ways to decorate them ever since. I used the plastic wrap method of applying alcohol ink to the first one , but I wanted to try something a little bit different for the others. I had some luck with s wirling or dripping ink and backing it with spray paint on another project, so I thought I'd try something similar for these vases. So I got out my craft mat and alcohol inks and selected some sunset themed colors. Ranger has a set of alcohol inks called Summit View that includes a purple, orange and yellow ink. I added some watermelon red and we had a nice selection of sunset colors. I dripped the different sunset shades of ink in random intervals around the top edge of the vase so that it would drip down into the vase. I was going for something mostly straight, but a few mixed or wiggly  lines were fine. I continued dripping lines of alcohol ink around the top edg

Tardis Tile Touch Up

Image
Last year I made an attempt at an artistic rendering of a starry sky with alcohol ink. I then decorated it with a vinyl decal of the TARDIS (from Dr. Who).  Back then, I wasn't sealing everything with Kamar Varnish after completing--especially if it was something I was planning on using decoratively. So with the little flecks of ink that came off when I applied the decal and some overall dulling of the ink in the last year, when a chip of ink came off (in the pink circle below), I knew it was time to touch up the tarids tile. When I applied the tardis decal, some of the ink in the lower right corner of the tile flaked off, but it looked sort of starry, so I didn't mind it much, but as the tile got a duller and another piece of ink flaked off, I got out my craft mat and got to work. I pulled out my blue , black , purple , and silver inks and dripped them onto areas that needed additional coverage or that had gotten a bit dull. I used some canned air to s

Plastic Wrap Alcohol Ink on Ceramic Tiles with Vinyl Decals

Image
A little while back , I cut a whole bunch of (mostly geeky) vinyl decals out of a sheet of holographic silver vinyl with my Silhouette Cameo . For this week's project, I applied them to some 4 inch ceramic tiles that I decorated with alcohol ink. I decided to use the plastic wrap method of ink application for these tiles. I wanted something  generally blue and not too busy, so I thought it would be fun to try to stretch the plastic a bit to create a more subdued pattern that what I usually get with the plastic wrap. I tore off a piece of plastic wrap about the size of both of my tiles, placed it on my craft mat , and dripped several shades of blue alcohol ink on the surface until it was nearly covered in ink. I set the tops of my ceramic tiles onto the alcohol ink and then folded them over so the plastic wrap pulled taut, and I had the top sides of the ceramic tiles facing out. Here's (above) the opposite side of my wrapped tiles. I lig

Plastic Wrap Alcohol Ink Fried Onion Container

Image
I can't seem to throw out those French's Fried Onion containers. The labels come off easily and they're a weird mix of plastic that I'm not sure would get recycled if I put it in the recycling bin, so I usually toss them into the craft bin after they've been emptied. In the past, I've covered them with tissue paper and mod podge. But this time, I wanted to try something different. Since the plastic wrap alcohol ink method works well on white surfaces , I thought I'd give it a try on one of the fried onion containers. I laid out some plastic wrap on a craft mat and covered it a rainbow of alcohol inks . After my plastic was mostly covered, I placed the container in the middle of the plastic wrap and wrapped the plastic around it. After the plastic wrap was securely wrapped around the container, I set it aside to dry. It takes at least 12 hours to dry. I usually leave it overnight or for a couple days before peeling the pl