Posts

Showing posts from December, 2018

Vinyl Decal Ceramic Tile Plaque: Dr Who Quote

Image
I'm still a beginner with my Silhouette Cameo , though I'm starting to rack up the projects. Using the machine is really satisfying. You spend time designing in the program and searching for images you can trace or download and then it takes a few minutes to cut it. I love instant gratification. So I've just started using adhesive vinyl for projects in my machine. I made some ceramic tiles for Halloween , I used the vinyl to do some glass etching , created simple monograms for our electric toothbrushes , and made some ornaments for Christmas. So I've worked out some of the kinks in the process. For this project I decided to take one of my favorite quotes from Dr. Who and put it on a 6 inch ceramic tile. I picked up a couple of these tan faux stone look tiles when they were clearancing them out at the hardware store for just this reason.  I selected a text that I liked and typed up my quote. I made sure the finished design was less than 6 inches and then ...

Alcohol Ink and Vinyl Decal Ornaments

Image
A while back I got some plastic ornaments on clearance after Christmas...I just picked up a couple, so they didn't match any of the other ones that I had. These two odd ball sizes never got picked in my crafting, so I decided it was time to finally do something with them. I used my Silhouette to cut out a bunch of snowflake shapes in vinyl . For most of these designs, I just found some free clip art online and traced it with the Silhouette program, but there are tons of snowflake designs available to buy and download, so pick whatever you like. I knew I was making the designs to be just a couple of inches, so they couldn't be too complicated. After I cut out my snowflakes with the machine, I used a scissors to cut each flake out in a square. Then I peeled off the vinyl outside of the design and used a craft knife to help me weed the tiny bits out of the design. After it was weeded, I used some painters tape and a dish scraper to make sure the design ...

Wooden Bead Garland Refresh

Image
As a child of the 80s, I saw a few Christmas traditions and decorations fall in and out of style. One of those was wooden bead garlands on Christmas trees. They were very popular in the 80s but were replaced with ribbons in the 90s and never quite regained their popularity. While shopping at a thrift store after Christmas last year, they had sets of wooden bead garland that were an exact match to a string I had from my childhood, so I picked up a couple more strings for a dollar. I figured it would be really easy to spray paint the beads a single color to lose the 80s blue and rustic vibe. I ran out of my good silver spray paint (which would have been super schnazzy), so I opted for bright red instead. I used a couple of big boxes and coiled the beads around the bottom and sprayed on a coat, and then another coat, and then another coat. A couple of the beads didn't want to take color. It was also annoyingly just above freezing, so I had to keep bringing the boxes...

Spray Paint Ornaments

Image
Over the years, I have tried several methods for decorating plain ball ornaments. I've decoupaged them, put photos and images inside of them, and tried several methods for alcohol   inking them . One of my earliest projects on this blog was swirling around craft paint inside the ball ornaments. So, as I was thinking about what Christmas crafts I could do this year, trying to spray paint the inside of ball ornaments popped into my head. I had no idea if it would work well or at all, but I thought I'd give it a whirl.     I gathered a basket of plastic ball ornaments and a bin full of spray paint. I also grabbed an egg carton and some paper towels so that I could have a dying station for the ornaments that would keep them from rolling around. The process was pretty easy. I sprayed paint into the ornament and swirled it around. If I wanted colors to mix, I'd spray them into the ornament when the paint was still wet. If I didn't want the colors to m...

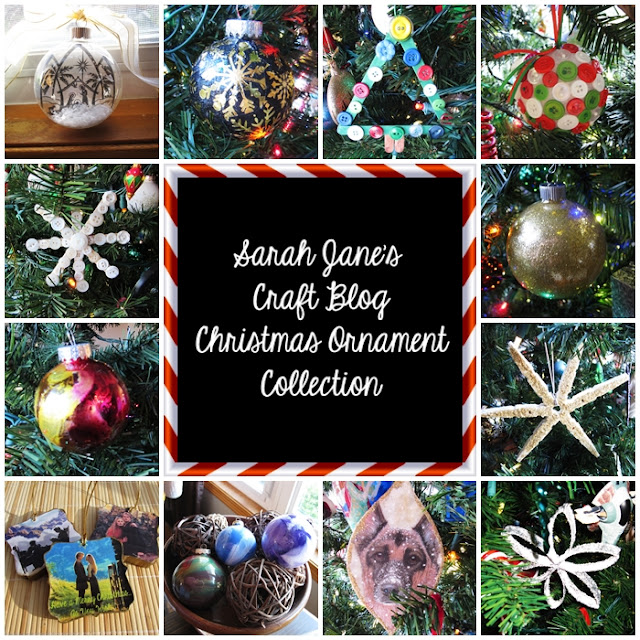
Christmas Ornament Collection

Image
I've got some Christmas Crafts in the works--but until then, revisit some of the blog's classics with the Christmas Ornament Collection .

Textured Alcohol Ink Tiles and Alcohol Ink Thinner Tests

Image
Over the past few weeks, I've been testing the thinners that are used with alcohol ink. I tested rubbing alcohol , Ranger Blending Solution , and Pinata Extender with dropped ink and with stamped ink . For the most part, I determined that the thinners don't react too differently with the ink itself. The Extender seems to thin the ink without separating the color quite as much, but in the end they all dry looking pretty much exactly the same. So I thought I'd try one more test--the fluid ink test. How do the inks behave when thinned heavily and blown around? I used the same ink for each test--this time a Pinata (Rain Forest Green) Ink. I dripped a few drops on and then used a bunch of the thinning solutions and blew it around with a can of air to see how it behaved. The first test was of the Ranger brand Blending Solution. It moved freely and created a lovely green splash across the tile.   Next I tried the Pinata Extender. I dripped a few drops of ink and...