Posts

Showing posts from 2012

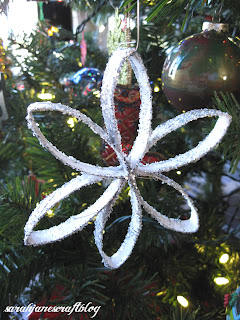
Cardboard Tube Christmas Wreath

Image
I said when I posted the Cardboard Tube Snowflake Ornament  tutorial that I had made a couple of crafts using my cardboard tubes. Well, here's the next one--a Christmas Wreath. You will need: Cardboard Tubes (toilet paper, paper towel, or wrapping paper tubes will all work) Hot glue gun and glue Green Spray Paint 1" Round Paper Punch Red Paper Festive Bow Cut your cardboard tubes into one inch pieces and pinch the ends to make them oval.  Glue five of the tube sections together at the point to create a flower. You'll need 9-10 flowers for a wreath made from wrapping paper tubes.  I ended up using 9.  Place the flowers in a circle and glue them together at two of the points to create a wreath. After the glue on the wreath is dry, spray paint it green.  I was using cheap spray paint, so it took several coats to get full coverage.  The photo below is after just a couple of passes with the spray paint.  It really felt like I was spraying t

Cornstarch Dough Ornaments

Image
Last Christmas I saw a recipe for Cornstarch Clay to make ornaments. So, after I was done baking Christmas Cookies, I whipped up a batch and made a giant mess (as seen below). The recipe is as follows: 2 cups Baking Soda 1 cup Cornstarch 1 1/4 cup Water Stir all ingredients together in a stove pot and bring to a boil. Cook the dough until it thickens to the consistency of mashed potatoes. Then remove the dough from the heat (turn it out onto some parchment paper or onto a plate) and let it cool. I found that the dough was the easiest to work with when it was luke warm--not cold and definitely not hot. When I worked with the dough too hot, the dough was too loose and stuck to everything. When it was cold, it was crumbly.  Once the dough is the right temperature, roll it out on a cornstarched surface (I used a silicone pastry mat ) and cut out with cookie cutters. Be sure to poke your hole at the top of the ornament (I used a chop stick). You can then let t

Cardboard Tube Snowflake Ornament

Image
Cardboard tube crafts have been really popular on the web lately.  Last Christmas, I saved all of the tubes from the wrapping paper I used up, and chopped them into 1 inch tubes using my paper cutter. (When you cut them, they get smooshed into ovals.) After I chopped them up, I threw them in a cardboard box and shoved them in a closet, and there they sat for a year.   Last week I dug them out and made a couple of holiday crafts with them.   You'll need: A cardboard tube (a paper towel roll, toilet paper roll, or wrapping paper roll) scissors hot glue gun and glue spray paint glitter mod podge and a foam brush for application First off, I cut 6 (because thanks to my sister, I know that real life snowflakes always have 6 points) of the tubes in half so they are approximately 1/2 inch thick. I then grouped 3 together and glued them at the points with a hot glue gun (you may be able to use other glue, but the hot glue gun is probably the easiest sinc

Glitter Ornaments

Image
Most projects you see posted on the internet are not as easy as they appear.  Sometimes, the simple directions turn into a disaster.  This is not one of those projects.  These glitter ornaments are just as easy as all of the online articles make them seem.  Just swish around some floor wax inside the ornament, and the glitter sticks right to it. For this project you need: Clear Glass Ornaments Glitter Funnel  Floor Wax (it's not really wax, but it's the stuff that makes your floors shine--not degreaser or cleanser) The only "catch" to this project is that the floor wax stuff costs about $5 a bottle--and that's the cheap stuff.  Of course, you use very little in the ornaments, and you can shine the floor with the leftovers.  I bought this brand because it was less expensive than some others, it is safe for laminate floors (which I have), and has a pull spout at the top that will make squirting into the ornament easier. Squirt about a

Button Ornament

Image
This is a super easy project. I bought two bags of cheap buttons at Wal-mart and attached them to the Styrofoam ball with stickpins. I wished I had more variety in the sizes and colors of the buttons, so if you had some lying around in a jar at home, that would probably work even better. I used a T-pin to attach some red and green ribbon to the top of the ball because the weight of the ball was too much for a regular pin.  The T-pin solved the problem and kept the ribbon from pulling free of the ball. 

Adventures in Dehydrating: Kiwi

Image
My husband received a food dehydrator from his mother for Christmas last year.  In the past year we've dehydrated lots of fruits and some meat for Jerky.  And during those experiments, most of what we dried turned out great.  Of course, it's always trial and error when cooking, and that's especially true of dehydrating because of all of the factors that keep recipe books from having definitive times, widths to cut things, and even temperatures to set your dehydrator at.  Much of these estimations and ranges have to do with your dehydrator--they don't all have the same motors or settings.  Air temperature and humidity also play a part, and so do variations in the food you are drying (ex: different types of apples grown in different climates harvested at different times are going to have different water content).  That being said, I hope I can share a few of the things we've learned about dehydrating by showing some of the things we have been successful at dryin

Painted Glass Ornaments

Image
Several years ago, I was shopping at the Ben Franklin in Wilmar, MN (yeah, that long ago), and I saw a flyer for a craft project where you drip craft paint into a glass ornament and swirl it around to create nifty marble effects.  Well, that day I bought some glass ornaments and grabbed the flyer.  I then went to grad school and moved 3 times before I actually completed the project....but the ornaments survived the moves and I finally did the project. :)  All you need for this project: Glass ornaments craft paint a tray lined with paper towels to let the ornaments dry in My craft flyer from 2002 said I should clean the ornaments out with rubbing alcohol before I painted them, and since these were older ornaments, I went ahead with this step to remove any dust.  If your ornaments look clean, you can probably skip that step. Next, take the metal caps off and drip some paint into the ornament.  The amount you see in the photo below would probably be plenty to cover

Snowflake Punch Ornament

Image
I saw an adorable ornament on Pinterest made with flowers from a paper punch pinned onto a Styrofoam ball.  I thought a ball covered in snowflakes would be even more Christmas-y....that and I have a snowflake punch, some nice blue scrapbook paper, and a spare Styrofoam ball on hand.  I love crafts where I don't have to buy anything! This project requires: a Styrofoam ball (I bought mine at Wal-mart) a shaped paper punch (mine is a snowflake, but you could do stars or flowers--whatever you prefer) paper  a ribbon to hang the ornament and a scissors After I gathered my supplies, I punched a bunch of snowflakes out of some light blue scrapbook paper.  I had planned on using white card stock to contrast with the blue, but the thickness was a bit much for my cheap paper punch (which was most likely picked up in the dollar bin at Michael's), so I ended up using plain old copy paper.  It was a bit flimsy but worked fine. After you've punched a bu

Transparency Christmas Ornaments

Image
Last year I picked up a couple of boxes of plain glass ornaments at Hobby Lobby or Michael's at 50% off after Christmas.  So this year, I get to figure out what the heck to do with them.  My first project was to print out a couple of designs on transparency paper to create a cool translucent effect.  Of course, the real trick with this project was getting decent photographs.  The rest of the project was super easy.   I had some leftover printable transparencies lying around from back when teachers still used overhead projectors (5+ years old).  You may have better luck photocopying your designs onto regular transparency film as I have no idea where you can get ink jet transparencies anymore (perhaps office supply stores or here ).  I found a few designs online that I thought would work.  The first was a black and white silhouette of a nativity scene.  The second was a snowman with a blue background (think snow globe effect). The third one I found was a snowy scene that did

Happy Halloween!

Image
Hubby's work was having contests this Halloween for costumes (he is going as Corporate Darth Vader--Vader wearing a shirt and tie) and treats and decorated pumpkins.  He didn't have a clue what to bring for a spooky treat, so I pulled up my Halloween pin board and thought that the witches' fingers made out of dipped pretzel rods with almond fingernails would be easy and cute. To make your own you'll need: A bag of pretzel rods A package of almond bark Food coloring A microwave safe bowl The smallest bag of almond slices that your grocery store sells Wax Paper Spoon The inspiration used green colored candy melts.  The comments discussed peoples' problems dyeing white chocolate with liquid food coloring.  I opted for almond bark and made a test batch for the coloring just in case.  The almond bark is artificial enough that it doesn't seize up or get thick when using liquid dye.  I melted half the big block (six cubes at once) and used

Halloween Themed Felt Flower Wreath

Image
I've been on a bit of a felt flower kick lately. They are super easy and inexpensive, so it's hard to say no to making more.  This wreath was originally inspired by a wreath I saw on Pinterest that took a dollar store wreath and spray painted it.  So that's where I started, with one dollar store wreath and some spray paint. After I successfully painted the wreath orange, I opted for making some orange and black felt flowers since the orange would be lost on the background of the wreath and the black would be so dark that you wouldn't be able to see the details.  Cut two circles of felt the same size and stack the strips up as you roll them up. (For more pictures of this process, see my first felt flower project )  The flower below started with two circles about 4 inches in diameter. Once the felt has been rolled up, glue it all together on the bottom with some hot glue or fabric glue. I liked the orange and black flowers so much that I dec