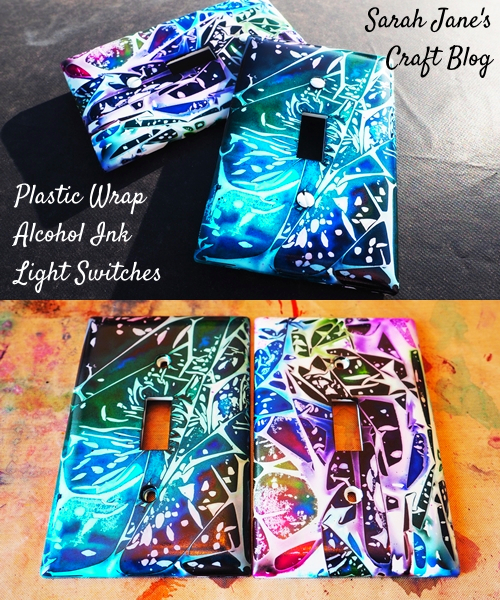
Plastic Wrap Alcohol Ink Light Switch Plates
I've inked my fair share of light switch covers. It's a fun small project to add a little pop of color to a room, and plastic light switch covers are pretty cheap. I still had a bag of light switch covers leftover from the past time I inked them and, well, this pandemic has put a dent in my stash of stuff to ink, so I looked at them and thought...hmmm, what could I do that I haven't done yet. Over the course of the last year, I've been plastic wrap inking all the things. It's such a fun and fast alcohol ink method! I hadn't tried it on light switch covers yet, so...here we go.
I rolled out a craft mat and a sheet of plastic wrap. I gathered up some colors of alcohol ink that were on the cooler side of the rainbow (no red, orange, yellow, etc...so it wouldn't turn my greens brown).
I dripped ink onto my plastic wrap and totally forgot to take a picture of it before I plopped the light switch covers onto the ink. I scattered the ink around the plastic wrap until the area was mostly covered. I tried to make sure that the plastic stayed a bit scrunched up before I plopped the switch covers down.
Then I wrapped the edges of the plastic wrap up onto the backs of the plates/covers and folded it up into a neat little book. One side turned out pretty blue and green.
The other side turned out very rainbow colored. I set my book of light switch covers aside to dry for a day before coming back to it.
The next day, the ink had darkened and dried. I poked at the folds and there wasn't any ink squishing around, so I knew it was dry (this usually takes 12-24 hours depending on humidity levels and the amount of ink).
I unfolded the book and began by peeling the plastic wrap off of the backs of the switch covers.
Then I peeled up the plastic wrap from the fronts for the big reveal!
This switch cover was really bright and colorful when it was wet. It had a a lot of folds (big white spots) and ended up darker than expected.
The blue and green one turned out about as I expected it to for colors, and the plastic wrap pattern turned out pretty good, too.
All in all, I was pleased with how these turned out, and I was happy to find yet another surface that works for plastic wrap inking. I hope to seal these this week if the weather cooperates. I will spray them with a couple coats of Kamar Varnish followed by a couple coats of acrylic sealer.


thanks
ReplyDelete