Posts

3D Printed Travel Toothbrush Case
Image
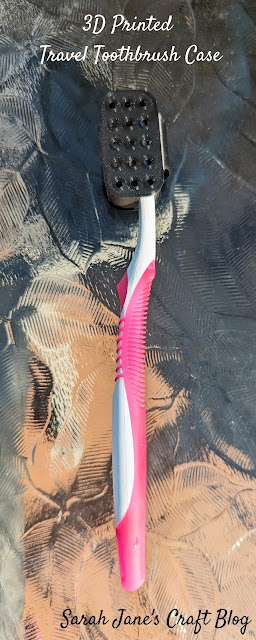
There have been fewer 3D printing projects shared on here lately. It isn't because we've grown bored with our printer . It's been because it's been acting up. All spring and summer we've been trouble shooting the darn thing. Hubby eventually decided to replace the extruder , and a bit of tweaking later, and we seem to be back in business. I was looking for a simple project to get us back into printing and to make sure everything was working and I found this great little toothbrush case . I set it to standard resolution (.2) and 100% infil as the designer recommends and printed it in black PLA .  It took about 50 minutes to print. The print came out pretty cleanly. Just a little bit of stringiness that I had to clean up. It worked well enough that I immediately printed a second one. I think this quick little print will probably get a lot of use. I'm so glad we're back to 3D printing!   

Vinyl Decals on Alcohol Ink Stained Wood Signs

Image
A few weeks ago I tried staining some wooden pl aques  from Dollar Tree with alcohol ink. It worked pretty well (for the most part), so I decided to turn them into some signs. I wanted to make the fun multicolored sign (made with plastic wrap application of alcohol ink) into a sign that referenced the 80s in some way. So I found a little frame and some font that reminded me of those letters you could buy (in the 70s and 80s) to iron on to t-shirts and whipped up a little design. I wasn't too sure about what to do with the purple one until I saw this week's free design in the Silhouette store and knew it would be perfect. After I measured my signs and resized everything in Silhouette Studio, I opted to throw a couple of Santas up there to fill in the width of the white vinyl sheet I was cutting so I didn't end up with a weird L shaped leftover. :) Hopefully those will get used in a few months to make something festive. I loaded my vinyl onto a mat in my old Cameo (it loads...

Alcohol Ink on Yupo Pendants

Image
Ages ago I bought some Yupo. Yupo is plasticized paper that's used for mixed media art--especially media that thrives on glossy surfaces like alcohol ink. There are other similar products now, like Nara , and other Alcohol ink "papers."  But it's not cheap, so I haven't used it for much. But I thought it would work perfectly for making necklaces with the bezels and cabochons that I have since it would use so little of the paper to make them. So to start with, I needed to get some ink onto some Yupo. I decided to use my T-Rex ink for this project since the colors are lovely, and I'm trying to get more use out of them. So I got out a craft mat , a can of air , some rubbing alcohol and a hand bulb. I also grabbed a paint brush in case I wanted to make some fine details. I'm just using a 5 x 7 sheet of Yupo, and it should be plenty of paper for this project. I started with a magent-y purple. I dripped some ink on the paper and then used a bunch of rubbing ...

Suncatcher Collection

Image
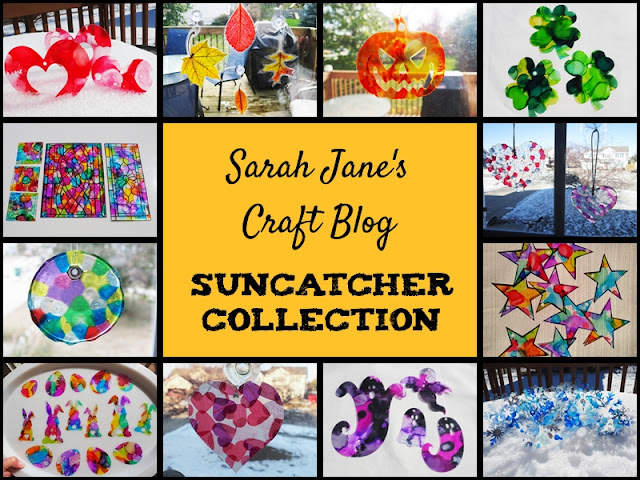
Check out the Blog's collection of Suncatcher crafts here: Suncatcher Collection .  Here are a few of my more recent suncatcher projects: Faux Stained Glass Cardinal 3D Printed Window Pumpkin 3D Printed Easter Ornaments Thanksgiving Faux Stained Glass (Laminating Pouch, Vinyl Decal, and Alcohol Ink) Faux Stained Glass with Alcohol Ink and Laminating Pouches

Decoupaged Tea Tins

Image
As the summer months draw on, there is one constant--iced tea. My favorite brand comes in these lovely tea tins, and because I have a hard time throwing out potentially useful things, I have several of these things floating around. So, I decided to jazz a couple up to make some storage tins. I started by washing the tins and removing the date sticker on the bottom and then spray painting them with several thin coats of white spray paint . This ended up taking several coats before I was happy with the finish. Light coats are best when spray painting, and it took quite a few to cover the printed design on the tin. Once my tins were spray painted and had a couple days to finish drying, I got out my supplies. I brought out a silicone craft mat , mod podge , a foam brush, and some die cut card decorations from my craft stash. The die cuts were from a tablet of scrapbook paper that I was gifted, I just punched out shapes that I thought would fit on the tins (and that there were two of so my...