Posts

Getting Organized

Image
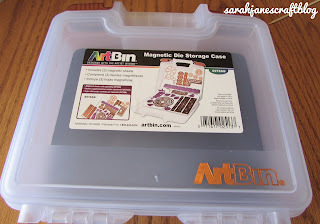
I've been crafting for my whole life, but I've gotten pretty serious about it in the last few years. That means I have tons of supplies. I try my best to buy them at reasonable prices, but it's of very little consequence if I end up not being able to find them or ruining my supplies because they are tossed in a random box or thrown in a pile. So I've been making an effort as of late to store my supplies better.  Metal dies are a bit tricky to store. They need to be kept flat so they don't bend and they can be sharp or at the very least, a bit pokey. I had been storing them in a plastic shoe box with my embossing folders, but I was worried they'd get bent and it was hard to see what I had. So I bought an  Art Bin Magnetic Storage Case . This box is fairly small--about 10 inches--but stores a ton of dies. The box comes with 3  Magnetic Die Sheets  and you can buy more to fill it. 3 sheets doesn't seem like much, but I was able to fit two comple...

Tissue Paper and Mod Podge on Drink Mix Containers

Image
I'm no stranger to decoupaging tissue paper onto plastic containers . It's an excellent way to cover surfaces that aren't perfectly straight and that need to remain semi-flexible and sealed once finished. So when I had managed to accumulate three of these lovely little containers for Target's version of Crystal Light, I knew exactly how to cover them.  I grabbed my Mod Podge , a foam paintbrush, some coordinating tissue paper, and a scissors. I used the container as a template for the tissue paper. Tissue paper is tough to cut straight, so if I'm using a scissors, I'll fold the paper to create a cut line. Another good way to cut tissue paper and keep it straight is with a rotary cutter and a ruler. I tend to cut it just a smidge bigger than I need, I'd rather have too much paper than not enough. Then I spread a thin layer of mod podge onto the container with my foam brush. You don't need much, just enough to get a good seal betw...

Applying Alcohol Ink with Wax Paper

Image
After last week's second experiment applying alcohol ink with plastic wrap , I was eager for more unusual application methods. I found a couple of white ceramic tiles and figured they were the perfect medium for trying something different, so I grabbed some wax paper . I figured the effect would be fairly similar to the plastic wrap. I rolled out my craft mat and brought out my alcohol inks . I wiped off the ceramic tile with a paper towel wetted with some rubbing alcohol and let it dry. To get the tile covered in ink, I started by squeezing some ink onto the tile. Then placed the wax paper onto the tile and lifted it up. It created a wet mix of colors. I layered some additional colors on and applied the paper repeatedly. I would place it on the tile, wipe my fingers over it and then lift it up. I would reposition the paper to move any ink that was still on the wax paper to a different part of the tile. As I continued to apply the paper, it started...

Plastic Wrap and Alcohol Ink Candles

Image
This fall I tried a new technique with alcohol ink that I had been wanting to try: plastic wrap. The first project I used this technique on was a decorative wine bottle from the dollar store. For that project, I struggled with the plastic wrap not being large enough to cover the whole bottle, so when I decided to do it again, I picked a project that I could easily wrap a piece of plastic all the way around. I also thought I'd be more adventurous with my color choices (last time I chose colors all in the same color family). So this time I chose to make some rainbow colored altar candles .  I put down my craft mat and chose a selection of rainbow colored alcohol inks in bright shades. Then I scraped the labels off of the altar candles (and used some goo gone to remove any leftover stickiness). Then I tore off a sheet of plastic cling wrap and put it down on my craft mat. I randomly dripped my colors onto the plastic wrap. I noticed that the green was mixing wi...

Recycled Peanut Container turned Condiment Canister

Image
Just a quick recycle craft tutorial this week. You know you might have a problem when you need to make a special container for your hot sauce packets. That being said, I needed a special place for my hot sauce packets. :) So I salvaged a peanut container from the recycling and made a label by finding a photo of some peppers and then searching for a transparent logo to drop over the top. I put it all together in word and added my own glowing text. Then I printed off the whole page onto regular printer paper (24lb white). Then I cleaned the label off of the peanut container. It was a stubborn one. It required a trip through the dishwasher, scraping, goo gone, more scraping, more goo gone...you get the idea. But once it was clean I measured the area that the old label covered and cut my new label to size with a paper cutter. This particular container called for a 3 1/2 inch tall by 8 inch wide label. Then I used a foam paintbrush to apply a thin layer of mod podge ...

Simple Knotted Suede Bracelet

Image
I bought myself a subscription to Martha Stewart Living last week. It was on sale--I don't usually buy magazines. After I rolled my eyes at Martha's calendar for March (which listed her plans for starting her garden and throwing birthday parties for her grandchildren), I came across a little project for a bracelet that I could do (and had all the stuff to make). Then, I went into my craft stash and got the things I needed and actually made it. Seriously, how often does that happen (and from a magazine no less and not the digital wonderland of Pinterest)? The answer--I can't remember ever making something I saw in a magazine. Well, there's a first time for everything. I started by fishing some charms out of my bins of jewelry making stuff. I found some skeleton keys, an owl, an Eiffel Tower, a shamrock, and a little blue circle that says "Happiness." I started by using some jewelry pliers to attach jump rings to the charms. If you've never ...