Posts

Showing posts with the label gaming

3D Printed Card Trays for Welcome to...Your Perfect Home

Image
Last week I shared a 3D printing project to upgrade our Quacks of Quedlinburg board game.. This week I'm sharing another board game upgrade. One of our favorite games is a flip and write (flip cards and write on a game board) called Welcome to...Your Perfect Home . We have purchased several expansions for the game, so I was having a hard time figuring out how to neatly store everything. So, when I saw this card tray set for Welcome to..Your Perfect Home , it looked like exactly what we needed. I set up the files with standard settings (.2 resolution, 20% infil) and sliced the small tray and the large tray files. With our 3D printer , I printed the smaller tray first using some Blue PLA . The smaller tray took about 7 hours to print. Between the design and the PLA plus that we used to print the tray, it's very sturdy and it printed perfectly. It did take a little bit of coaxing to remove it from the print bed, though. The larger tray was printed the next day. We used the same ...

3D Printed Quacks of Quedlinburg Crates

Image
I knew I wanted to print these crates for Quacks of Quedlinburg as soon as I saw them on Thingiverse . They looked like they'd be super functional for storing the pieces and making the game set up a bit faster. They were also cute, designed to look like little wooden crates. I sliced the print files from Thingiverse using standard settings (.2 resolution, 20% infil) with automatically generated supports. The crates have a slot for a lid and a lip for stacking on the base that both require supports. I printed the crates on our 3D printer using some matte brown filament . The crates took 4-5 hours to print. The prints came out a bit messy (most likely because of the supports) but generally printed well and were easy to clean up afterward. I printed 3 of these crates without dividers and 5 with two dividers/3 compartments. I chose to print them all with the slots to hold the cardboard books for the game. One of the 3 compartment crates is used to store the white starter tokens and ...

3D Printed Dice Trays

Image
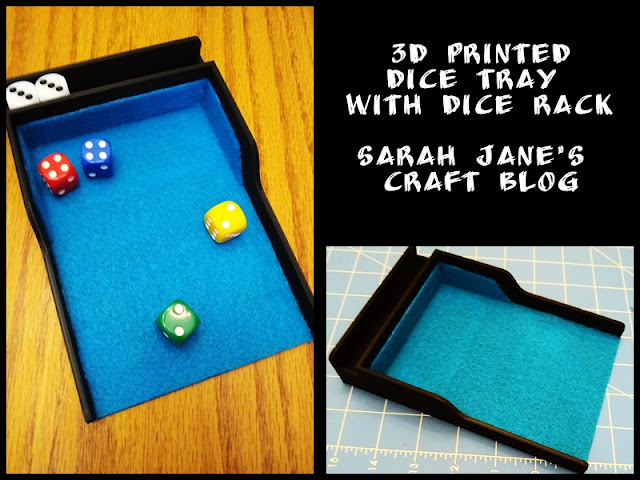
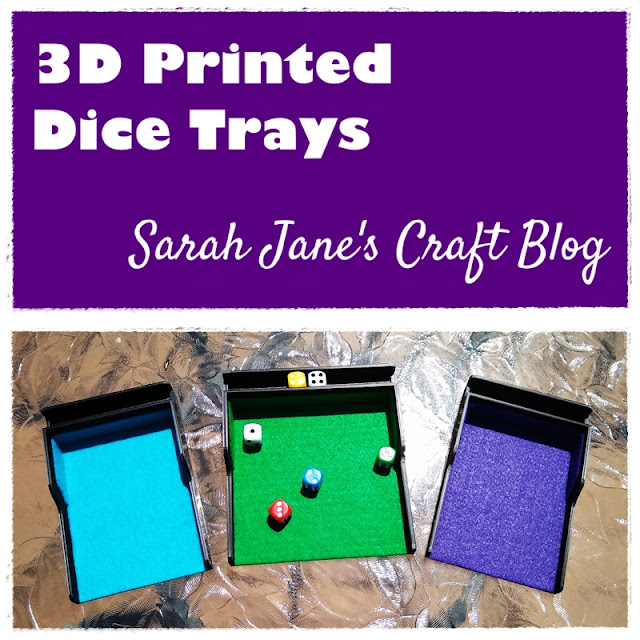
A couple weeks ago, I printed one of these dice trays with our 3D printer . I thought it turned out great so I printed another. Then my hubby said he wanted one that was bigger, so I increased the width of the original print files and printed a 3rd! All I did was stretch the file in my slicing program before printing so the dice tray area was pretty much a square instead of a rectangle. Stretching the width kept the dimensions of the dice rack at the top/back of the tray the same while making the dice area bigger. Then I printed it with some Black PLA as directed by the original post (.2 resolution, 15% infil). After the trays printed, I cut some felt to fit inside the tray and used a layer of tacky glue to stick it to the tray.  The post on Thingiverse also gave dimensions for back and side bumpers, I adjusted those for my new width and glued those onto the sides. I used a craft/popsicle stick to spread the glue and wiped off the excess with a wet paper towel.  These turne...

3D Printed Dice Tray with Dice Rack

Image
This week a dice tray caught my attention on Thingiverse. This project also had the benefit of bringing together 3D printing with regular crafting, which is right in my wheel house. I printed this project using the instructions on the post on Thingiverse: .2 resolution, 15% infil. Other than that--the print had no special instructions. As long as your bed is level, this is a simple print. It's printed using black PLA filament and the entire print took about 8 hours. It was dark when it finished printing, but it turned out perfectly. You may have to let this one cool on the bed for a bit before prying it up since it has such a large flat area--mine was fairly well stuck on there. Next up, the crafty bit. I dug through my craft stash to find some felt and I opted to use a rotary cutter to cut it nice and straight. The original post has the exact dimensions listed for the felt, so I used their dimensions and cut the pieces out with a rotary cutter . For the side pieces, I used the...

3D Printed Bits Bowls (For Board Gaming)

Image
In our quest for finding useful things to print with our 3D printer , we came across this design for board gaming bits bowls. If you play a lot of board games, you're probably familiar with the need for bowls for your board game pieces. So when we saw these stackable bowls with spouts for easy pouring/grabbing of tokens, I knew I wanted to try them. This photo is a bit blurry, but shows the first few layers of the bowl. This is a simple print using default settings (.2 resolution, 20% infil) that doesn't take too long to print. We printed using some black SunLu PLA filament . There are two sizes of bowls in the design files and after printing one, we decided we needed to print more. We printed a couple of both sizes and then tested them out with game pieces. The bowls stack together nice and compactly which makes them easier to store. The print comes out clean and sturdy without any modifications. We were really pleased with this design. We tested the bowls out while playing a...

3D Printed Dice Tower

Image
Over the last few weeks I've been sharing some of our first printing projects with our new 3D printer . This week we made a small dice tower designed for two players with fold down dice trays. We made this design but swapped out the trays for ones that were designed to work better with PLA (the type of plastic we were using).  We picked up some  gray filament  this week, and since the tower was designed after a castle tower, we decided to make the tower out of gray and the dice trays in  blue . We set the tower to print without internal supports or fill as there were no instructions to do so. the tower ended up printing a little less sturdy than we're used to, so if we make another, we'll probably adjust that slightly. The dice ramps were especially flexible after printing. We opted for the dice trays that were designed with little pegs built in instead of using separate printable pegs since commenters had problems with those when printed with PLA. These trays wor...