Posts

Showing posts with the label tissue paper

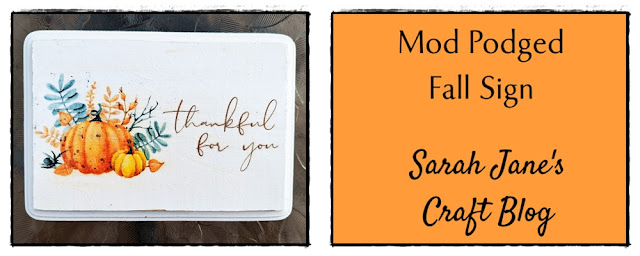
Mod Podged Fall Sign
Image
This summer, I picked up some wooden plaques from Michael's with a coupon because I didn't have any. I had no projects in mind, but I knew I'd use them eventually. Months ago, I spray painted two of them white and they'd been sitting in my craft cart since then just waiting to be made into something. (They were unfinished pine plaques, so it took several coats of spray paint to turn them solid white.) I found a website with free printable greeting cards  and found one that I thought would work well as a little sign and used the crop and resize tools in Word (top right when you click on the photo) to get it to a size that would fit on my wooden plaque. Then I taped a piece of white tissue paper to a piece of card stock. Make sure to tape down any loose bits so they don't get caught when they go through the printer. I put the tissue covered card stock in the paper tray of my ink jet printer . The first attempt was covered in ink--I hadn't taped it tight enough. So...

Mod Podge and Washi Tape Stick Pens

Image
The inspiration for this week's craft came from an unusual place. I was cleaning out some digital files and came upon an untitled document file. When I opened it, all it said was: decoupage tissue paper or fabric on stick pens. I don't remember jotting that down, but I thought, hey, that's not a bad idea. Especially after last week's post with jazzed up binder clips , I guess I'm starting a series on office supplies ...well, probably not, but here goes nothing. So, I gathered my supplies: Mod Podge , Stick Pens , a foam brush , a scissors, some patterned tissue paper, and a large paper plate to keep the glue off the table. I cut my tissue paper the length of my stick pen and a couple inches wide. I crumpled this paper to see if it made a different with the finished texture (it did not, so you don't need to do that). I used the foam brush to spread the mod podge onto the pen, then I lined the pen up on the paper so it would be straight. Then I rolled the paper on...

Laminated Tissue Paper Bookmarks

Image
A couple of weeks ago I made some sun catchers for Valentine's Day using tissue paper and clear contact paper. Which made me think...could I run tissue paper through my laminator? I have one of those inexpensive laminating machines that takes the laminating pouches, so if I could put tissue paper in one of the pouches, I could make more sun catchers, or something else with that fun stained glass effect. So, I grabbed a couple of laminating pouches and a stack of colored tissue paper. I started by using a scissors to cut strips of tissue paper of of the ends of the folded stacks of tissue paper. I cut them in strips between a quarter and a half an inch thick. Then I cut the strips at the folds. I tried to cut them different lengths and slightly different thicknesses. I wanted things to be a bit mismatched. Then I opened my laminating pouch and started laying the strips of tissue paper onto the sheet. I tried to overlap and angle the tissue paper, b...

Photo Coasters

Image
Last week, I made a quote tile by printing onto tissue paper and decoupaging it onto a ceramic tile. Well, it's my anniversary week and I made a few extra sheets of card stock covered with the tissue paper....so I decided to make some photo coasters using old wedding photos. I cropped my photos to 4 1/4 inches square--the size of my ceramic tiles from Home Depot. and printed them out onto a piece of tissue paper that had been taped over a piece of card stock. Then I set the photos aside to dry. I cut my photos out while still on the card stock and grabbed my  mod podge  and a foam brush. I painted on a thin layer of mod podge and carefully set the tissue paper photos onto the glue. I squared up the bottom edge and then just tapped it into place from the bottom up. Be sure your fingers stay dry because the tissue paper is very fragile and tears easily when it is wet with glue. Then I set the tiles aside to dry for about an hour. After the glue h...