Posts

Showing posts with the label mod podge

3D Printed and Decoupaged Puzzle Box Lid Stand

Image
Our 3D printer has been a bit unreliable lately, so I haven't been making too many projects. One of the last things I printed was this great puzzle box lid holder . When the print didn't turn out perfectly, I took the opportunity to try decoupaging on printed PLA.  I used standard print settings (.2 resolution and 20% infil) using some purple PLA . The print took about 12 hours on our little printer . When it was done, it looked stringy, but otherwise not too bad. When I pulled it off the bed, the base layer was discolored and full of the hairspray I used to help with bed adhesion. I was able to clean up the stringy bits without any issues, but the base level remained marked up no matter how much I cleaned (and lightly sanded) it. Since I used some Tacky Glue to attach some felt to a 3D print project in the past and it has held up really well, I was pretty sure Mod Podge (which has the same base--PVA glue) should work well too. I found a piece of scrapbook paper in my craft...

Decoupaged Tea Tins

Image
As the summer months draw on, there is one constant--iced tea. My favorite brand comes in these lovely tea tins, and because I have a hard time throwing out potentially useful things, I have several of these things floating around. So, I decided to jazz a couple up to make some storage tins. I started by washing the tins and removing the date sticker on the bottom and then spray painting them with several thin coats of white spray paint . This ended up taking several coats before I was happy with the finish. Light coats are best when spray painting, and it took quite a few to cover the printed design on the tin. Once my tins were spray painted and had a couple days to finish drying, I got out my supplies. I brought out a silicone craft mat , mod podge , a foam brush, and some die cut card decorations from my craft stash. The die cuts were from a tablet of scrapbook paper that I was gifted, I just punched out shapes that I thought would fit on the tins (and that there were two of so my...

3D Printed Ornaments with Recycled Christmas Cards and UV Resin

Image
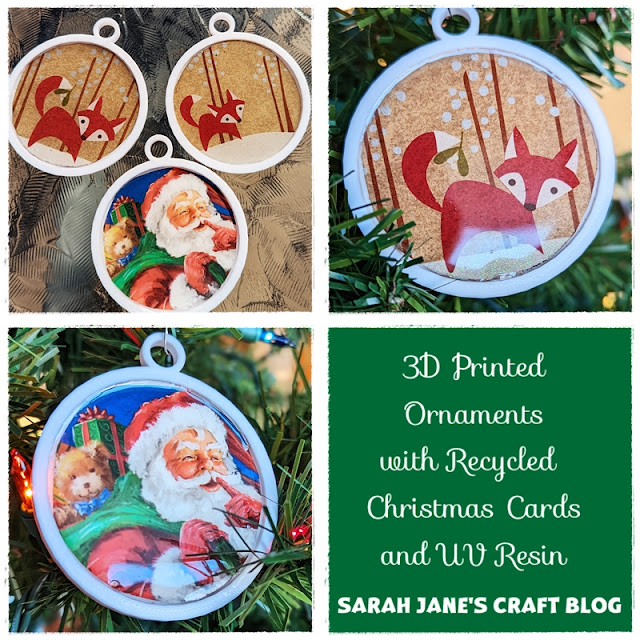
Last year I went a bit crazy printing Christmas ornaments on our new 3D printer . This year, I'm being a bit more selective. One of the things I knew I wanted to find a design file for was a good ornament blank. I knew I could do all sorts of fun crafts if I found a good one. Well I found the first one to try from someone who made and advent tree using these blanks . I followed the recommended settings (.16 resolution and 100% infil) with white PLA . The 100% infil made them pretty solid and meant that a fairly simple print still took an hour and a half to complete. After I managed to print a few of the blanks, I went through my stash of old Christmas cards which I save like a total craft hoarder (but it's not the first time I've used them: Recycled Christmas Card Ornaments ). I found a plastic lid that was really close to the the size of the inside ridge of the ornament blanks and used a pen to trace around the circle on the greeting cards and carefully cut them out. In t...

Mod Podged Fall Sign

Image
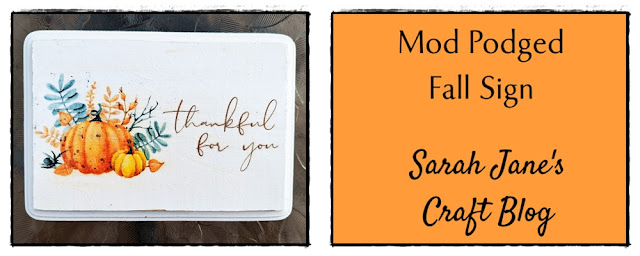
This summer, I picked up some wooden plaques from Michael's with a coupon because I didn't have any. I had no projects in mind, but I knew I'd use them eventually. Months ago, I spray painted two of them white and they'd been sitting in my craft cart since then just waiting to be made into something. (They were unfinished pine plaques, so it took several coats of spray paint to turn them solid white.) I found a website with free printable greeting cards  and found one that I thought would work well as a little sign and used the crop and resize tools in Word (top right when you click on the photo) to get it to a size that would fit on my wooden plaque. Then I taped a piece of white tissue paper to a piece of card stock. Make sure to tape down any loose bits so they don't get caught when they go through the printer. I put the tissue covered card stock in the paper tray of my ink jet printer . The first attempt was covered in ink--I hadn't taped it tight enough. So...

Mod Podge and Washi Tape Stick Pens

Image
The inspiration for this week's craft came from an unusual place. I was cleaning out some digital files and came upon an untitled document file. When I opened it, all it said was: decoupage tissue paper or fabric on stick pens. I don't remember jotting that down, but I thought, hey, that's not a bad idea. Especially after last week's post with jazzed up binder clips , I guess I'm starting a series on office supplies ...well, probably not, but here goes nothing. So, I gathered my supplies: Mod Podge , Stick Pens , a foam brush , a scissors, some patterned tissue paper, and a large paper plate to keep the glue off the table. I cut my tissue paper the length of my stick pen and a couple inches wide. I crumpled this paper to see if it made a different with the finished texture (it did not, so you don't need to do that). I used the foam brush to spread the mod podge onto the pen, then I lined the pen up on the paper so it would be straight. Then I rolled the paper on...