Posts

Showing posts with the label Thanksgiving

Thanksgiving Signs

Image
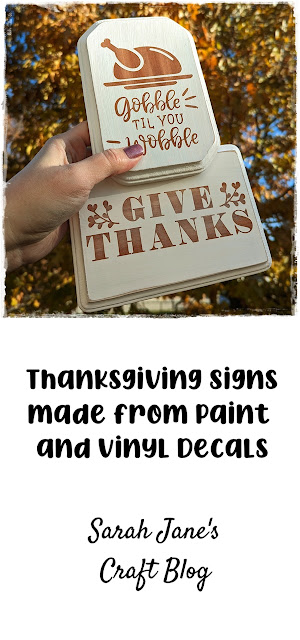
Last week I made a pumpkin spice sign out of a wooden pumpki n from Dollar Tree. The project was working so well, that I opted to turn a few more of the vinyl decals I cut from the week before that. I found some free designs and some freebies from the Sillhouette stores and made 3 pages of cuts all at once out of black vinyl I don't remember where this week's designs came from (that's what I get for cutting a bunch all at once). I used standard settings for glossy permanent vinyl on my old Silhouette and let the machine run. After cutting out all of my designs, I separated the designs from each other using scissors and set them aside for each project. I had a couple of wooden signs from a trip to JoAnne's ages ago that I hadn't made anything with, so after the Pumpkin Spice sign turned out so well, I decided to give them a similar treatment. I painted the signs with a layer of thinned-out brown craft paint and a tiny drip of maroon paint to make it warmer in c...

Dollar Tree Pumpkin Sign with Vinyl Decals and Paint

Image
Last week I cut a bunch of designs out on my Silhouette Cameo (v.2--it's an oldie, but still kicking). I made a couple of signs, but I'm back this week with more. This time, I used the vinyl decals as a resist to create a painted sign. I started by setting up a bunch of designs in the Silhouette studio. I think the Pumpkin Spice design came from a page that was doing a free trial.  Then, I cut all the designs out on black permanent vinyl . The removable variety might work for this project (since I'll be peeling it off after painting), but I've used the permanent vinyl before to make signs with paint like this , so I knew it would work and hand it on hand. After the design was cut out, I separated it from the rest of the sheet of vinyl with scissors and got started weeding. I carefully peeled away the excess vinyl to prepare the design. This was so much easier now that I picked up a new blade. Then I set aside the vinyl to prepare the pumpkin. I used some brown and bur...

3D Printed Pull-Apart Wishbone

Image
Just a quick silly Thanksgiving themed 3D print this week. I found this pattern for a pull-apart wishbone on Thingiverse and decided I needed to give it a try. I used standard settings (.2 resolution and 20% infil) and some brown pla filament to print this quick project on our printer.  I did have to enlarge the pattern quite a bit in the slicer, though. In the comments, the creator recommended a 2,540% increase, so that's what I went with. The project printed in about an hour and a half and fit together really well. The instructions said if the bones don't fit together tightly, you can use a lighter to adjust. Be really careful, though, a lighter can melt pla very fast. Ours fit together well. I might have to make one in white, too.  

3D Printed Turkey Napkin Holders

Image
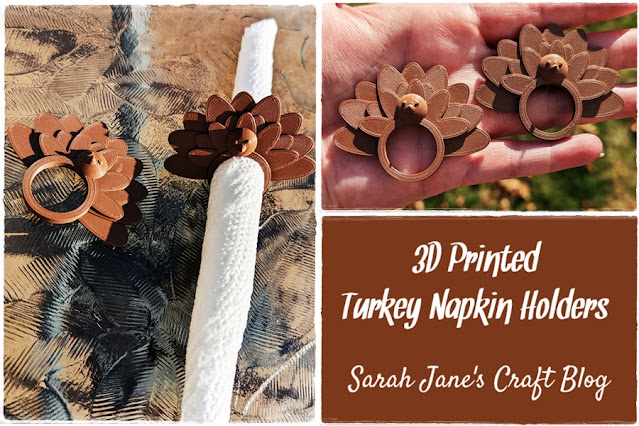
In preparation for Turkey Day, I printed these adorable Turkey Napkin Holders . This set was the smaller paper napkin variety, but they also made a larger version for cloth napkins. This project was printed with an Ender 3 V2 using matte brown PLA filament . I set the slicer at standard resolution (.2) and 10% infil. The print came out cleanly and only took about 30 minutes. So, I immediately printed another one. These turned out adorable, and I look forward to using them for many Thanksgivings to come.

Mod Podged Fall Sign

Image
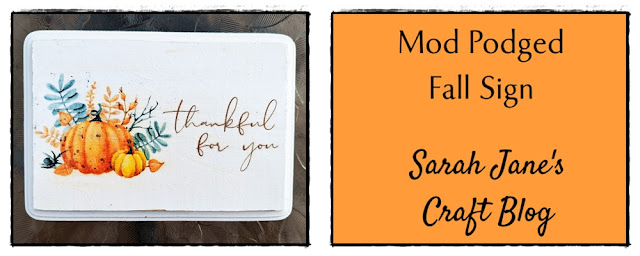
This summer, I picked up some wooden plaques from Michael's with a coupon because I didn't have any. I had no projects in mind, but I knew I'd use them eventually. Months ago, I spray painted two of them white and they'd been sitting in my craft cart since then just waiting to be made into something. (They were unfinished pine plaques, so it took several coats of spray paint to turn them solid white.) I found a website with free printable greeting cards  and found one that I thought would work well as a little sign and used the crop and resize tools in Word (top right when you click on the photo) to get it to a size that would fit on my wooden plaque. Then I taped a piece of white tissue paper to a piece of card stock. Make sure to tape down any loose bits so they don't get caught when they go through the printer. I put the tissue covered card stock in the paper tray of my ink jet printer . The first attempt was covered in ink--I hadn't taped it tight enough. So...