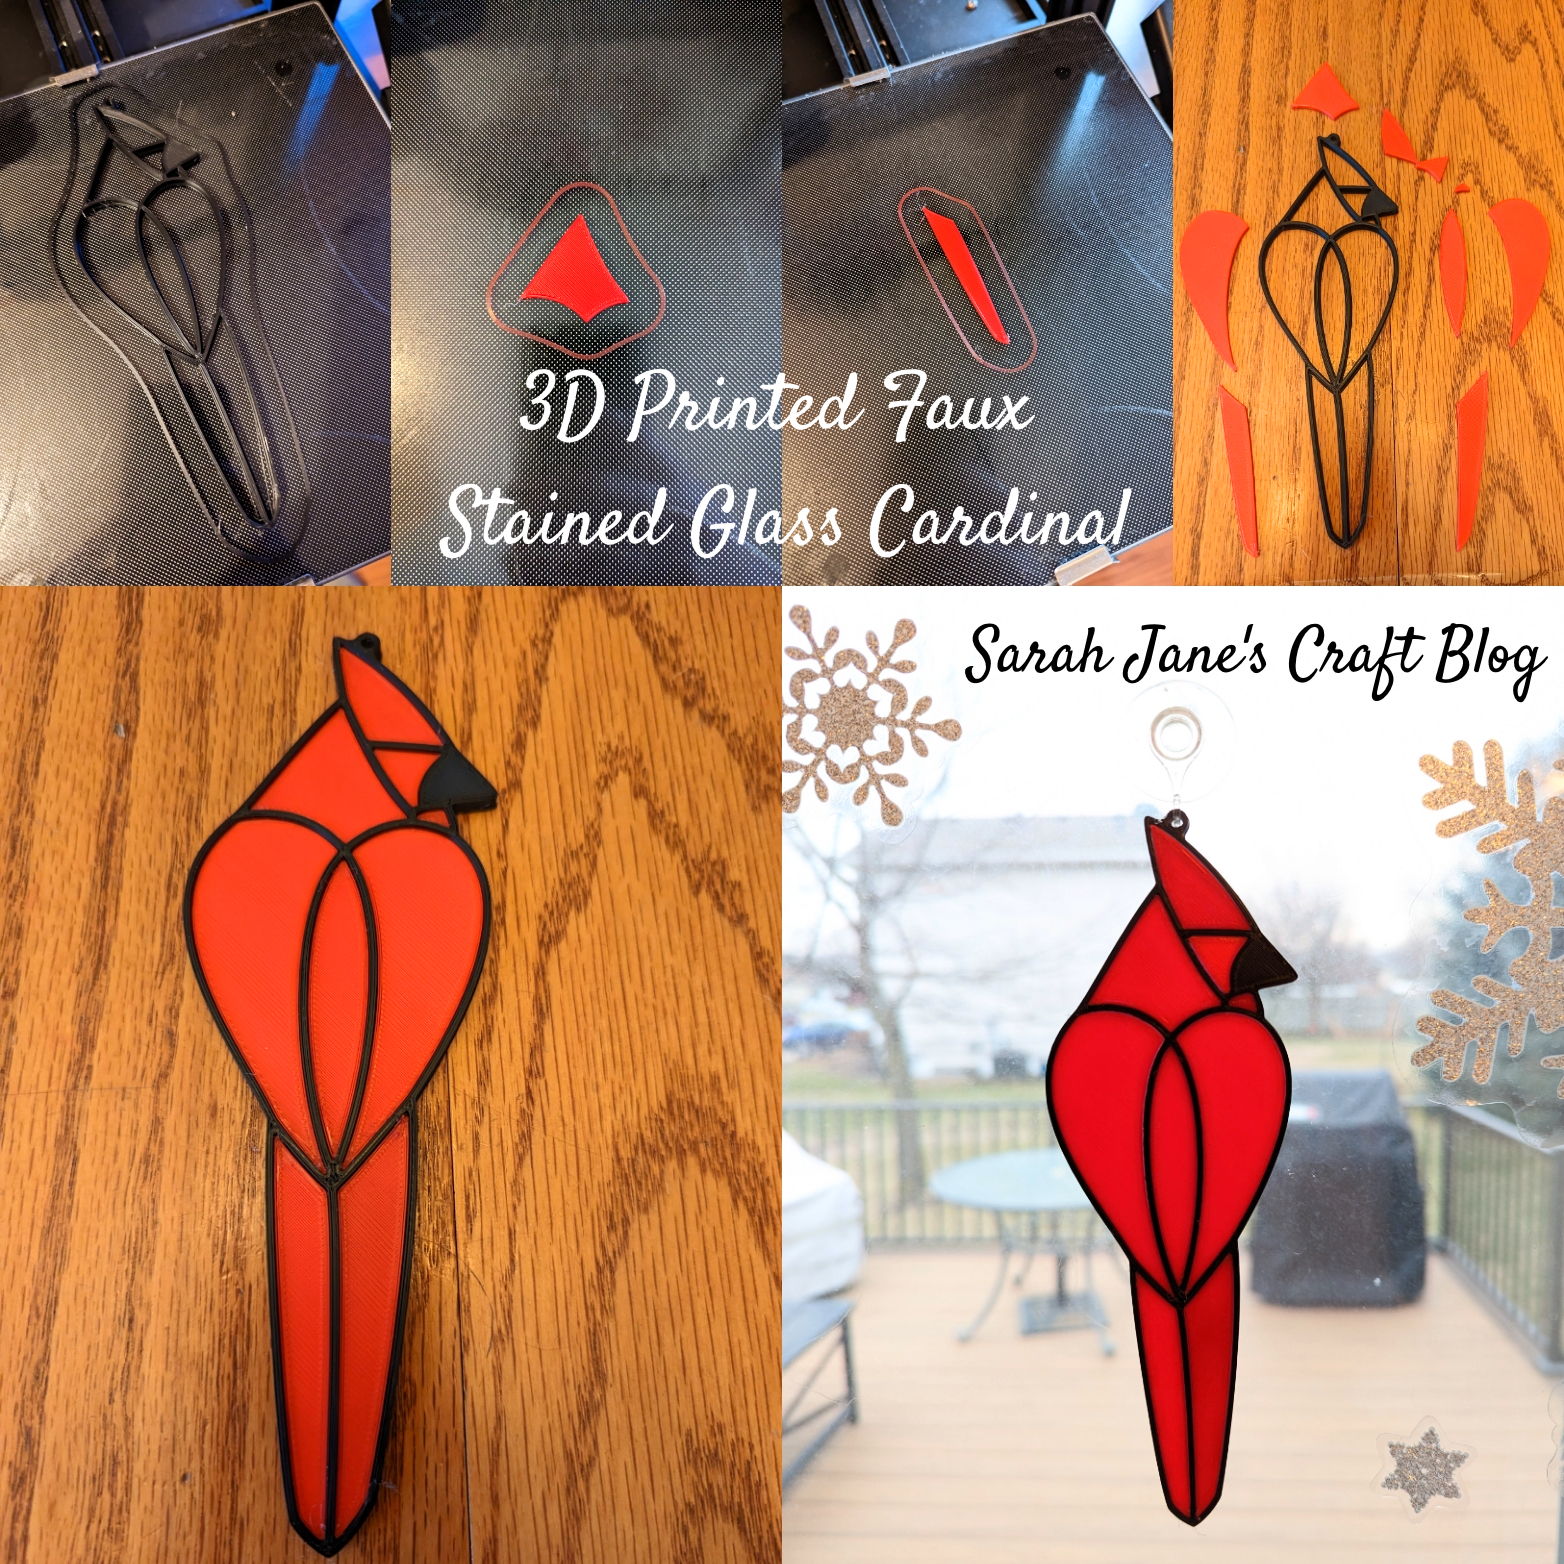
3D Printed Faux Stained Glass Cardinal
I was browsing Thingiverse looking for things to print when I had the idea that I could make a faux stained glass suncatcher using UV resin. So I went looking for stained glass frames that I could fill, and found that someone went to the trouble to design a few of these lovely faux stained glass birds--including designing the "glass" pieces to snap into the frame. So I figured I had to try it out. I selected the cardinal because it was only two colors (and they were two colors that I had).

I printed the frame in black pla. The instructions suggested using 100% infil for the interior "glass" pieces (so you couldn't see the infil pattern--unless that's the look you're going for). I opted to set all the pieces to 100% infil and standard resolution (.2). The frame section took about an hour and a half to print on our printer.

This print was pretty easy except that there were 10 separate pieces that needed to be printed. Our printer has a tough time with bed adhesion when printing multiple pieces (especially small ones), so I opted to print each one on its own. I still ended up running into a few issues. The smallest piece is tiny. I had to print it twice because the first time there was a stray piece of plastic on the nozzle and it just got drug away. I also had a problem with the file names being too long on two of the pieces and the Ender 3 v. 2 acted as if they didn't exist. Otherwise, all of the pieces were printed in red pla and each printed in 15 minutes or less. So even though it was a bit of a pain to print all those separate files, the project came through fairly quickly.


Comments
Post a Comment