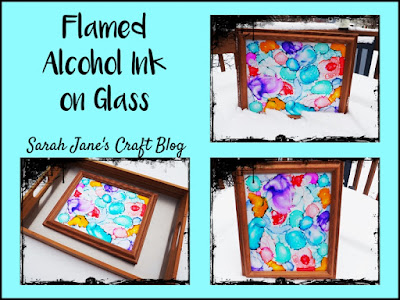
Flamed Alcohol Ink on Framed Glass
After last week's flamed bowl, the flamed alcohol ink had bitten me once again. I have been trying to go through my stash of leftovers for crafting and this old oak photo frame needed a new life, so I decided to ink the glass and make some art!
I started by taking the frame apart and setting aside the wooden frame and black backing. I cleaned the glass and set it aside to dry while I gathered the rest of my supplies.
I used my trusty quarter sheet pan lined in tinfoil. It was barely big enough for the 8 X 10 inch frames glass. Then I grabbed rubbing alcohol, pipettes, and my alcohol ink.
I decided to start with lighter colored inks and work my way darker so that the ink wouldn't get brown or black as it mixed. So I started with some of Rangers pastel inks.
After I squeezed some of the Aqua ink on the glass, I dripped some rubbing alcohol onto the glass with the pipette and then I lit it on fire. I was working on my ceramic stove top, and I had cleared the area of inks and rubbing alcohol before I lit my glass on fire. The more rubbing alcohol and ink you put on the plate before lighting, the bigger the flame will be. Stick with no more than a few drips of each before lighting to keep the flame reasonable. You may have to drag your lighter across the alcohol ink to get it all to light. Once the flame has gone out, be sure to wait a bit to make sure it's completely out (rubbing alcohol can burn without yellow flames and can be hard to see sometimes).
I added more light colors (I think this is Salmon, but it was really hard to take good pictures of this glass with the light ink and the tinfoil under it :)) and rubbing alcohol and lit them on fire, slowly layer colors to fill the glass.
Once I had used all of my light colors, I started adding in some more vibrant colors to add some accents. I used Pinata's pink and some Twilight purple and Sunshine yellow.
I just kept adding colors until I had pretty much filled up the piece of glass.
To see how it turned out, I held it up to the patio door. All the colors and textures were difficult to see until they were held up to some snow and light, but then they really popped!
I cut a piece of card stock down to 8 X 10 and reassembled my photo frame with the ink side of the glass facing in and backed with the white card stock. This quick art project was a lot of fun and I can't wait to raid my stash of old unused photo frames and try it again with different colors!


Comments
Post a Comment