Posts

Gerber Daisy Wreath made with Alcohol Ink Colored Flowers

Image
Last spring I saw an adorable simple gerber daisy wreath on pinterest. I knew it would be the perfect spring wreath, but I didn't want to have to buy bunches of different colored daisies, and most of the nice looking silk gerber daisies were not cheap.  So here I was, another spring had come, and I still wanted a cute spring wreath for my door, so I dug into my stash of leftovers and found some large white daisies, and I thought, I could color them--I've seen tutorials of using alcohol ink to dye silk flowers for cardmaking and scrapbooking, it shouldn't be too hard.  So, I had talked myself into it. I had 5 white daisies, so I picked out 5 bright springy colors to dye them. I started with purple (because it's my favorite). I used a few drops of rubbing alcohol on my applicator before dropping 4 or 5 drops of alcohol ink on to the applicator to thin the ink down a bit and help it soak into the flower. Then I started stamping on a covered surface (I used a ...

Crafting Revisit: Spray Paint Marbling

Image
Last fall I made my first spray paint marbling batch.  It was so much fun that I knew I wanted to do it again. I slowly acquired some of the tools I needed to make it even better this time (or so I thought). I bought a box of vinyl gloves, a bag of bamboo skewers to make a paint comb, and a bunch of new spray paint. I finally had everything I needed and the weather was cooperating to work outside again. I grabbed a scrap piece of cardboard and a roll of duct tape (in stylin' purple) and taped the tops of the bamboo skewers about a half inch apart and taped them down.  I used a pen as a spacer so that they would stay equidistant apart and fairly straight. I thought about using a ruler and marking with a line, but I'm lazy, and this seemed to work out pretty well. After my skewers were all taped, I taped over the whole thing to make a neat and tidy handle.  I went ahead and made a second comb with the tines about an inch apart too. Then I set up e...

Duct Tape Storage Boxes

Image
Here's a super quick project for you. Find some boxes that are the same size (and more importantly, are the right size for your space).  Cover them with Duct Tape that matches your decor, and voila, instant storage boxes. I am putting these boxes underneath our tv stand. The Xbox lives under there because there isn't room for it on the stand and the roomba keeps going under it and getting caught on wires, so I needed something to block the roomba and store some stuff in a pretty small space.  I found these two boxes that were the same size and cut them down to fit the space under the tv stand. I started by taping off the bottom of the boxes so that the bottom edges were all taped (you could just tape the bottom edges and leave the bottom untaped if you'd like too).  Then I taped around the sides and then folded pieces over the top edges. When you're all done, you'll be left with some surprisingly sharp looking cardboard boxes.  I have  seen l...

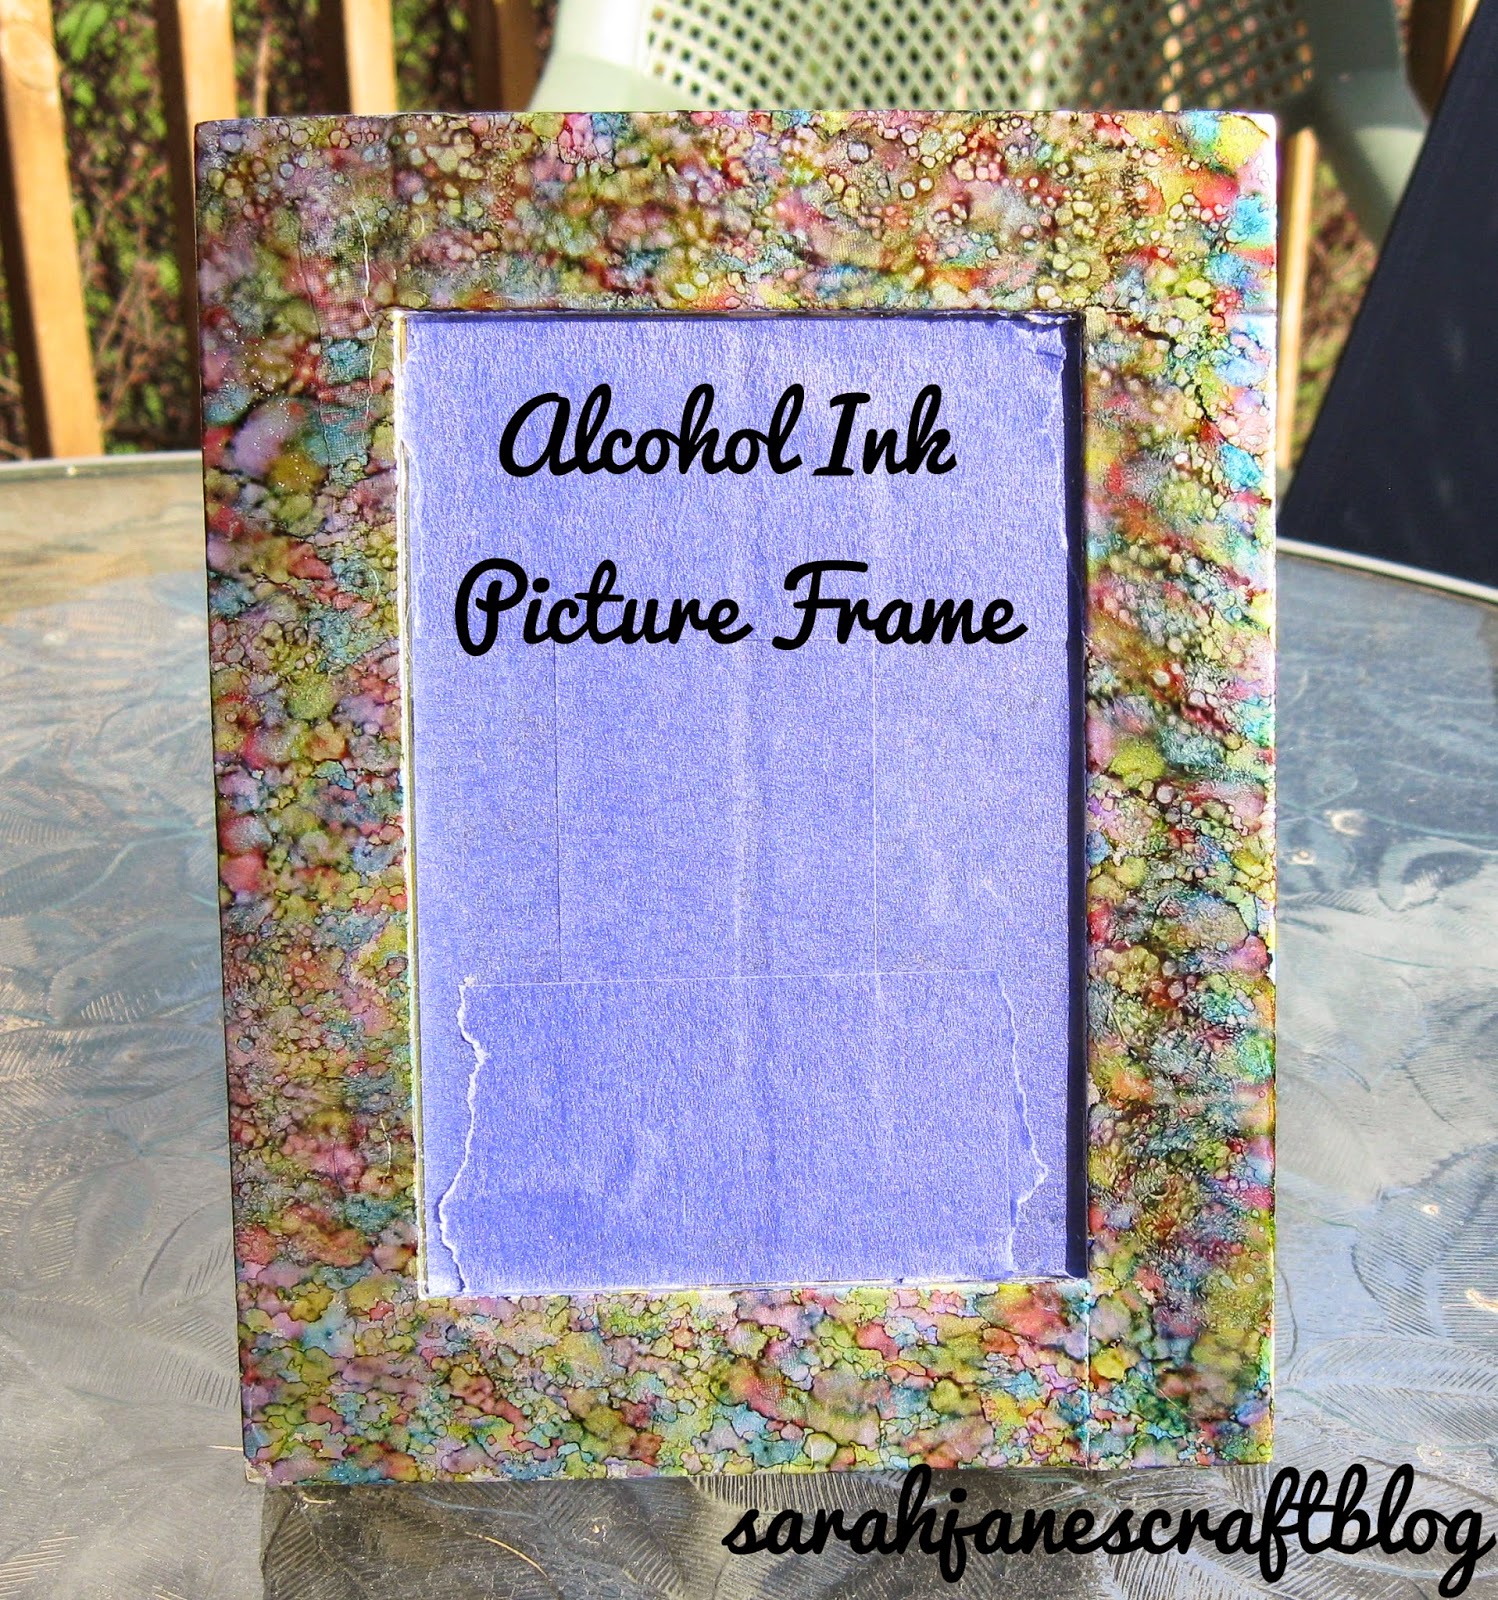
Alcohol Ink Picture Frame

Image
Alright, so I know I've been making a lot of Alcohol Ink projects, but they are just so darn much fun (and they are usually pretty quick).  After I spray painted some picture frames to give them new life a couple of weeks ago, I thought--hey I bet I could alcohol ink over silver spray paint....and yep, I was right, you totally can.  I grabbed a flat photo frame from my stash to give new life to.  This one is from the 90s.  It has flowers painted all over it and is a lovely shade of neon yellow-green.  Needless to say, it didn't really go with anything in my decor. So I grabbed the same box and spray paint from the last silver spray paint project and got to work.  I taped up the glass on this one instead of taking it off the frame as it's a shadow box frame.  The glass is held in place with wooden strips inside the frame.  I didn't feel like ripping the whole thing apart, so I taped the glass. The finish on this frame is odd. ...

Alcohol Ink "Dyed" Easter Eggs

Image
This week's post is a day early because it's EASTER.  Happy Easter!  I thought I'd share the project I made a few days ago now instead of waiting for a year to share it before Easter.   I was going through some links to alcohol ink projects online trying to come up with something new I could try with my inks, and I kept seeing the same projects over and over again, and I suddenly thought, hey plastic Easter eggs are smooth and non-porous, I should totally be able to use alcohol ink on them.  So I dug out some cheap plastic Easter eggs that I'm sure I bought after Easter on clearance in the last couple of years (since I used all my old ones up when I made my Easter Wreath ). So I grabbed a bunch of eggs and my inks and my craft mat and got to work. I left them split in half so that I could set them on the table without them rolling and I used a couple of toothpicks through the holes in the egg to help move them around and hold them. I put a piece of fe...

Washi Tape Photo Mat

Image
This weeks project was a Trash to Treasure makeover of some old picture frames.  I figured I could do one better and make some cute photo mats for the frames to jazz them up even more.  I grabbed some regular white card stock and popped the glass out of the frame and used it as a template.  I cut around the glass with an x-acto craft knife . After I had my frame sized card stock, I pulled out some washi tape that I got at Target on clearance (just over a dollar for 3 rolls of black and white washi tape--sa-weet!).  I taped it along each of the edges, not worrying about the ends because I was going to be mitering the corners with my craft knife. It's also not a big deal if the tape isn't perfectly positioned along the edge of the card stock since that will be covered by your picture frame--just get the tape on straight and you're good to go. The easiest way to do the corners is to just overlap the tape and cut a straight line from the inside...

Trash to Treasure: Spray Painted Picture Frames

Image
When I was cleaning up in the basement to make room for my crafting stuff, I came across some boxes of picture frames. I went through and sorted them into three piles: get rid of, keep, and make into something new. The "make into something new" pile was filled with frames that were dinged up or missing glass--ones that would probably end up in the trash if they were donated to a thrift store. So I figured I'd show them some love, or end up up throwing them out myself.   This pair of matching frames was at least intact. The back pieces were all there and in good shape, both frames had glass, but they were dirty and dinged up.  So, time for a quick makeover! First, I took off the backing and took out the glass and set it aside to be cleaned. Then I wiped off the old frames with a damp cloth and went over the dings with an emery board. Some fine grit sandpaper would probably work even better. Then I propped the frames up in a box and took advantage of ...